Okta
Discover step-by-step instructions on configuring a connection with Okta. Learn how to integrate your application with Okta to secure and streamlined SSO authentication.
How to start
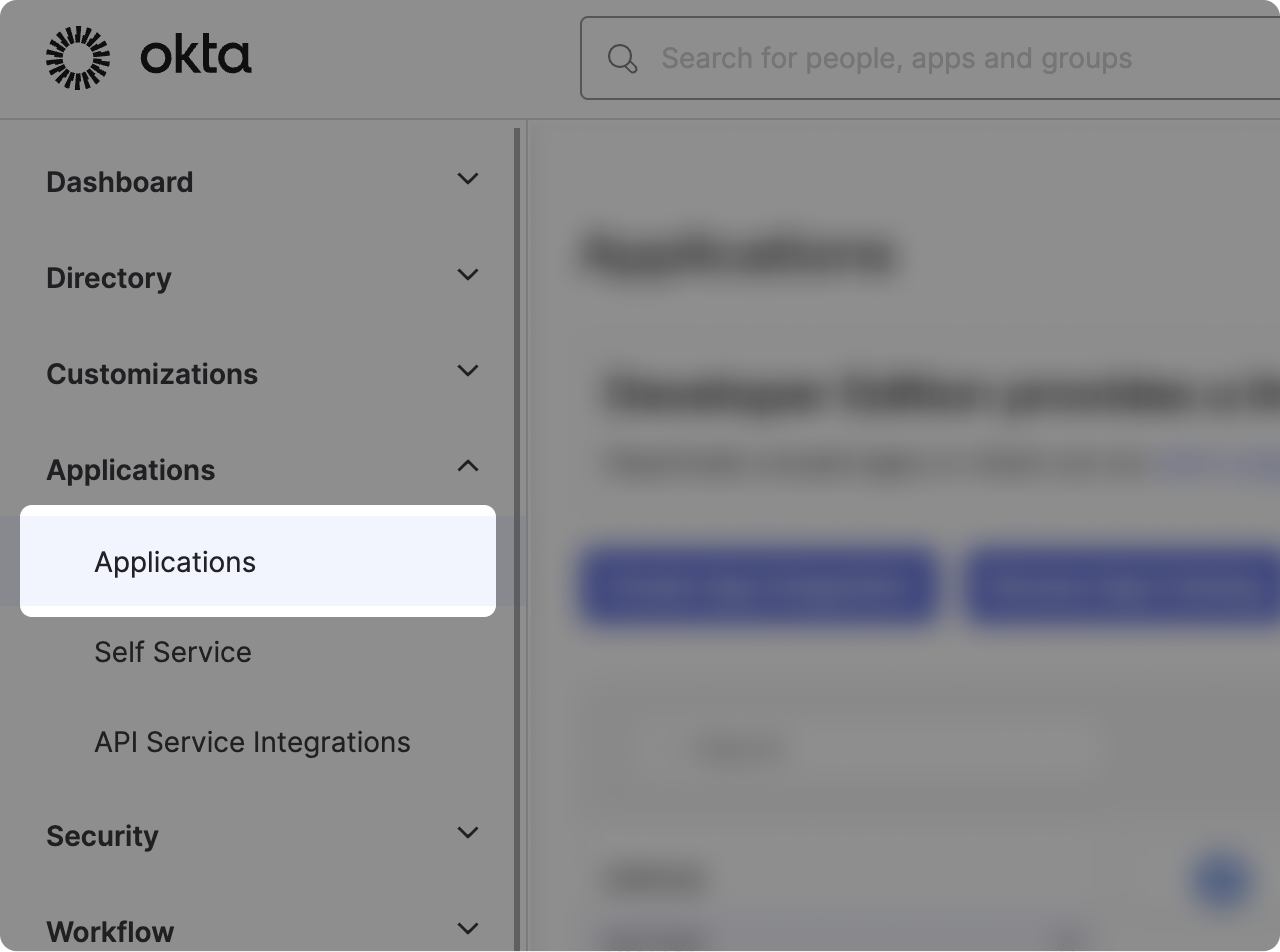
- Connect to your Okta developer account.
- Click on "Applications" in the left-hand menu, then click on "Applications" again in the dropdown.
Declare an application
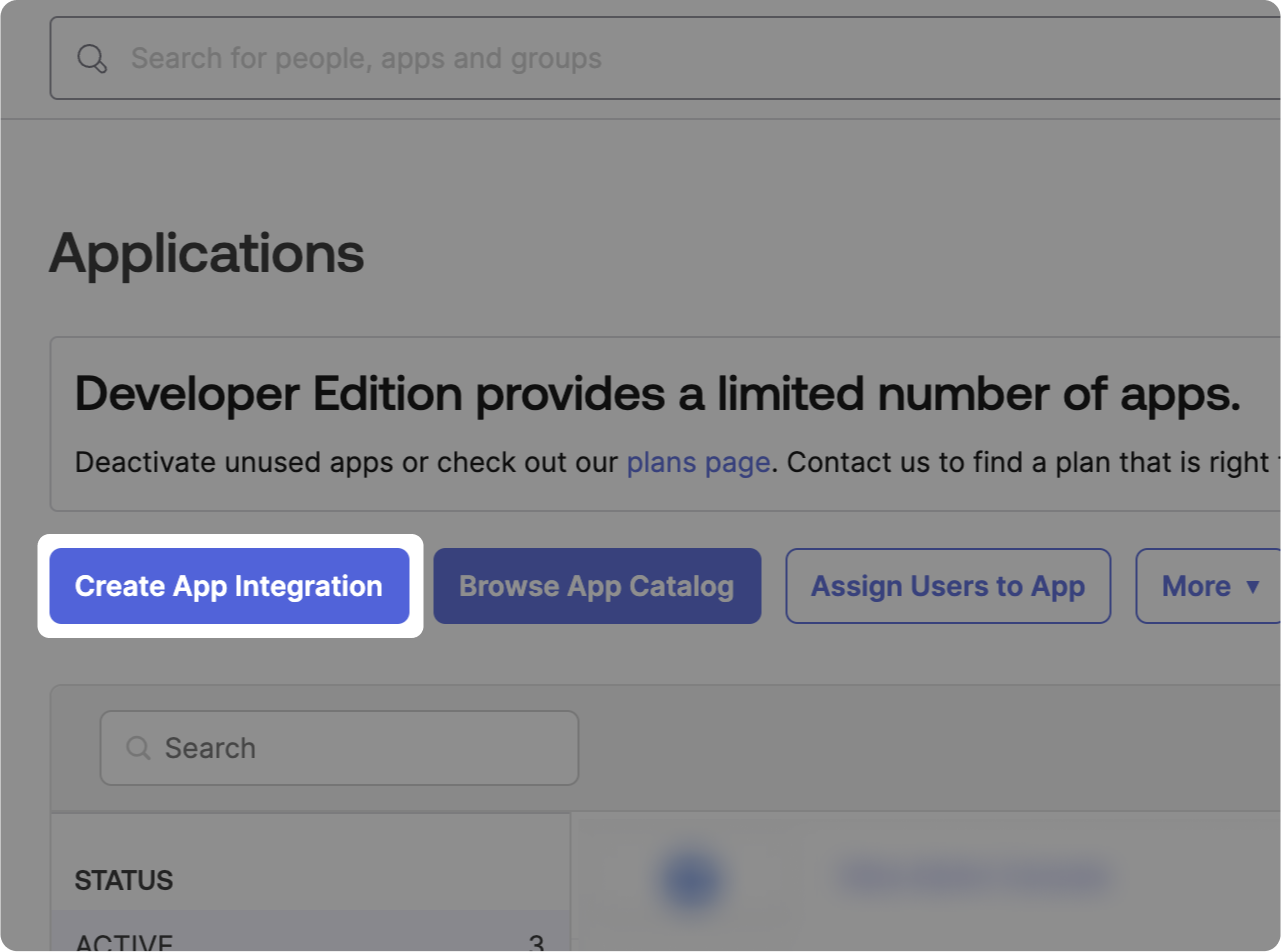
Click on "Create App Integration."
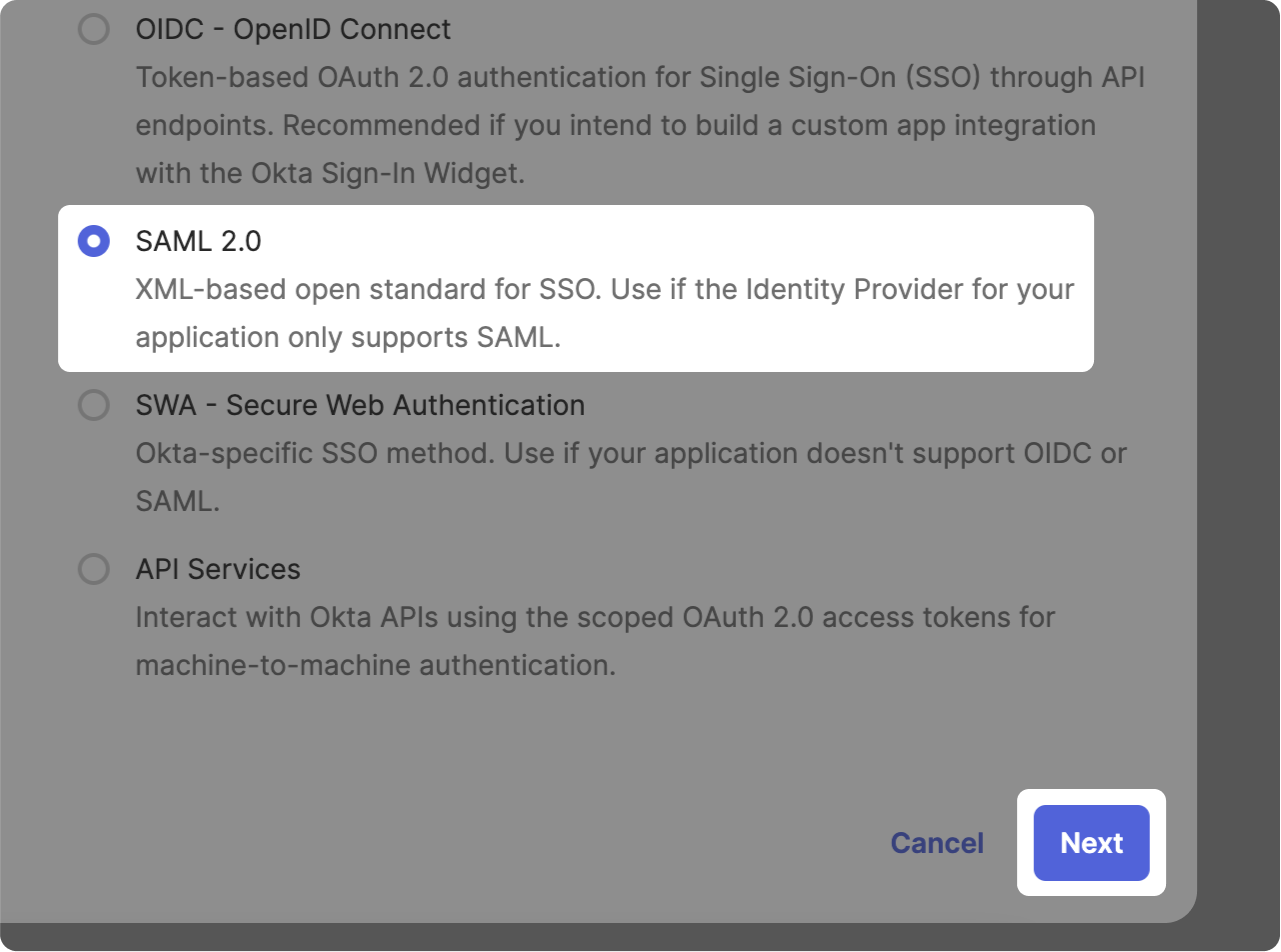
- Select "SAML 2.0"
- Click on "Next"
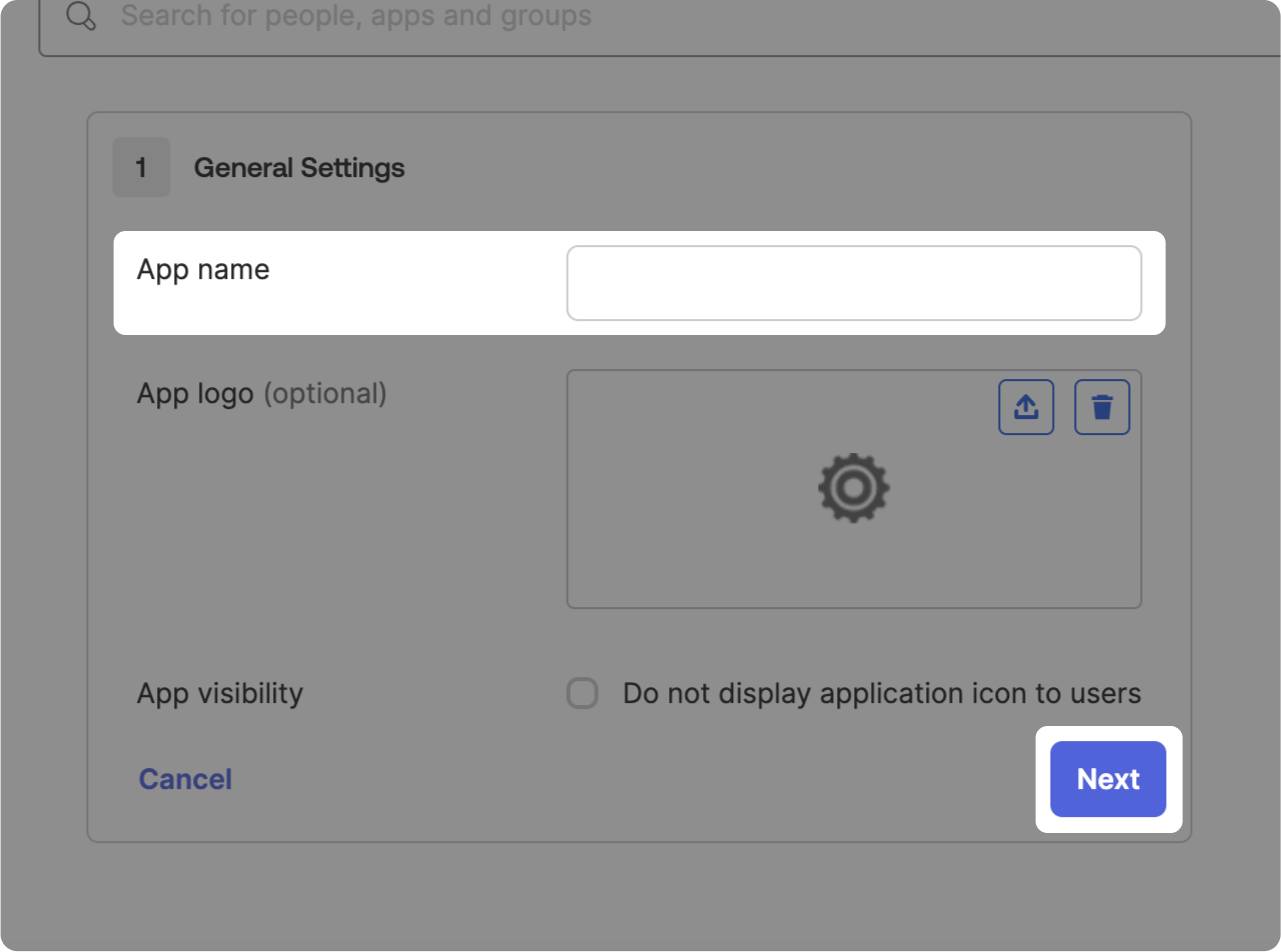
- Choose an app name (you may also choose a logo and other settings).
- Click on "Next"
SAML configuration
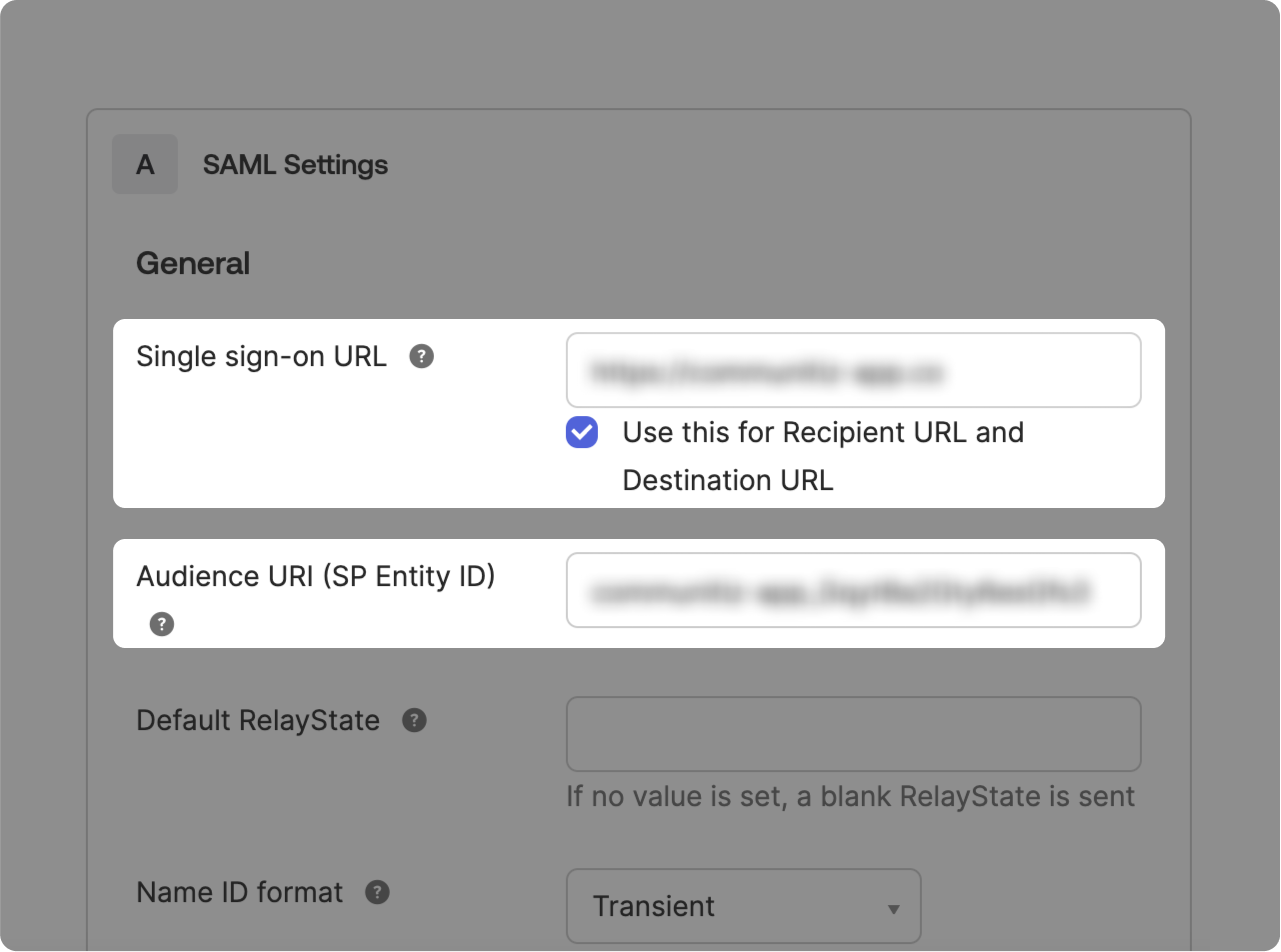
- In the "Single sign-on URL" field, paste the corresponding value, which is situated in the right sidebar 👉
- In the "Audience URI (SP Entity ID)" field, paste the corresponding value, which is also situated in the right sidebar 👉
Certificate
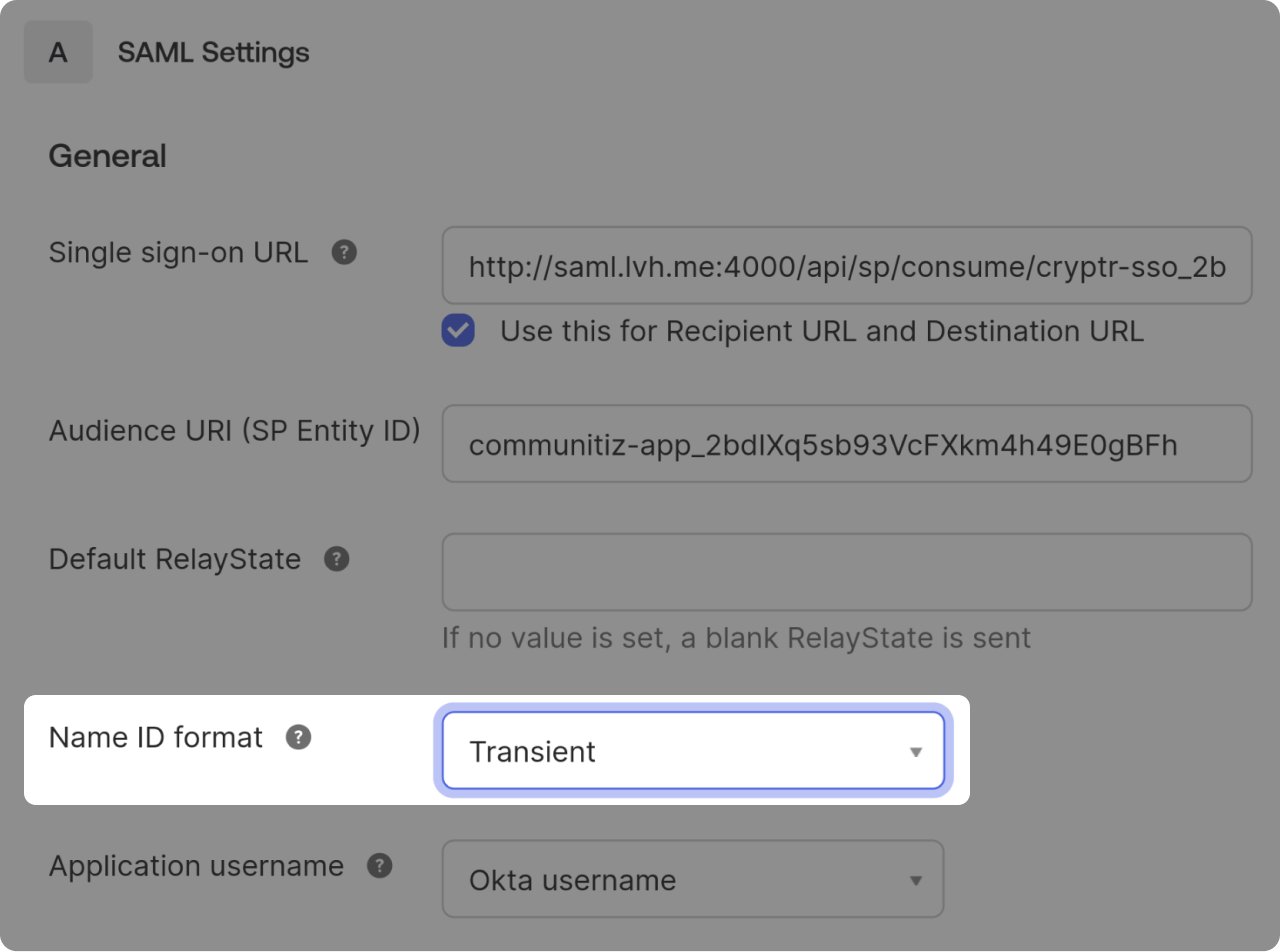
- In "Name ID format" select "Transient"
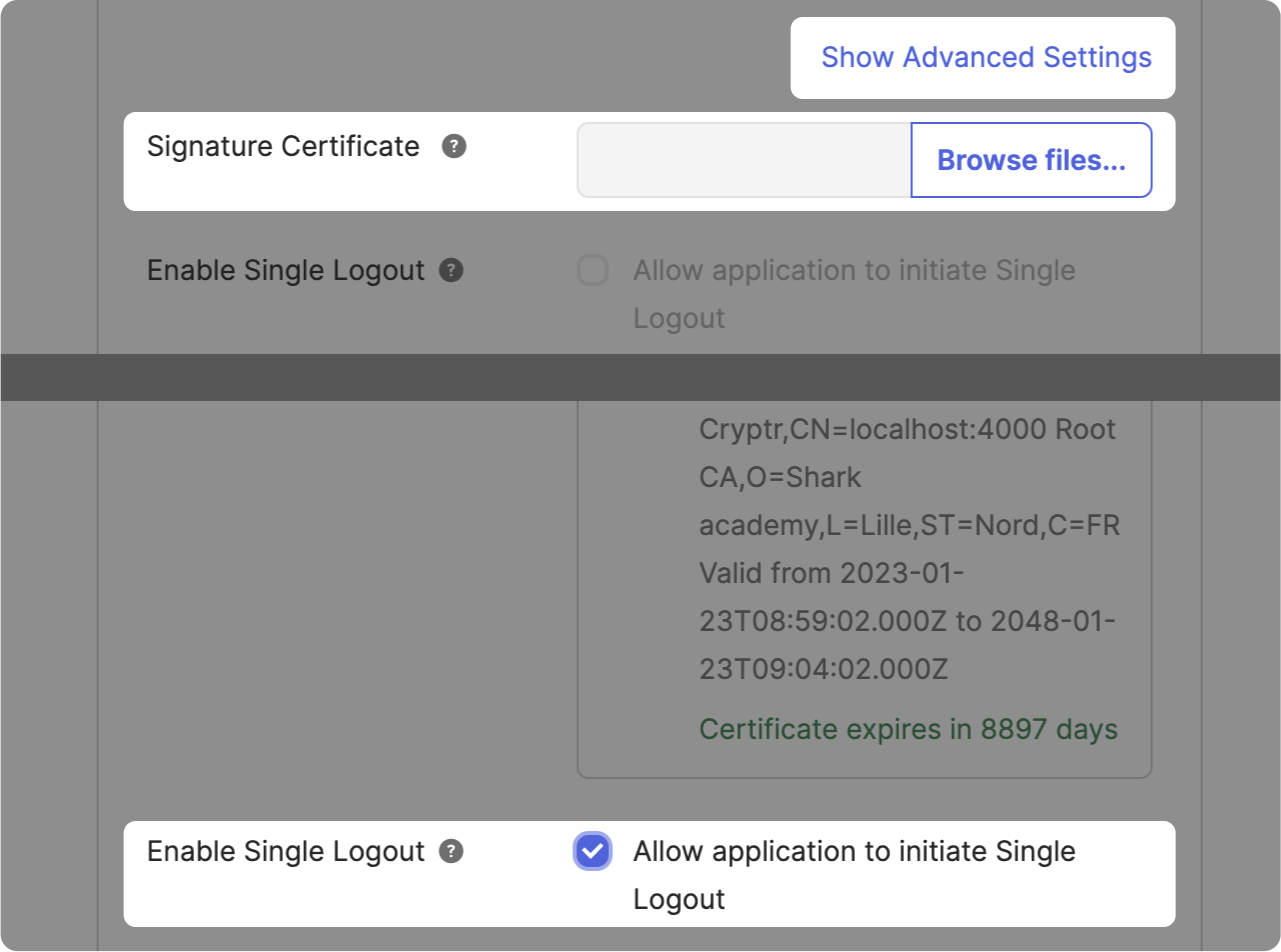
- Click on "Show Advanced Settings" to expand.
- Download your certificate file by clicking on "Download Certificate" in the right sidebar 👉 and upload it.
- Once the file is uploaded, you can check the "Allow application to initiate Single Logout" box.
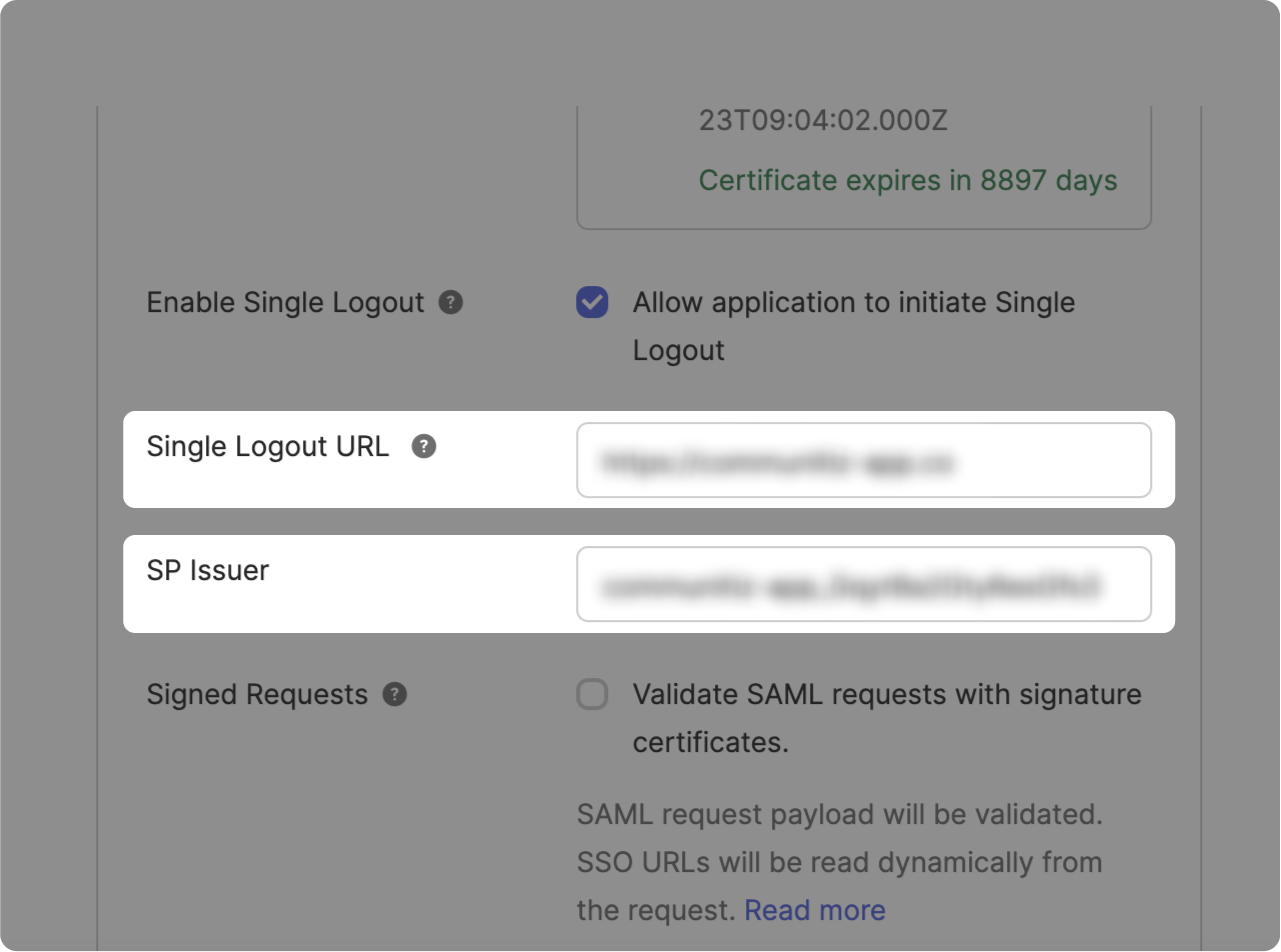
- In the "Single Logout URL" field, paste the corresponding value, which is situated in the right sidebar 👉
- In the "SP issuer" field, paste the corresponding value, which is situated in the right sidebar 👉
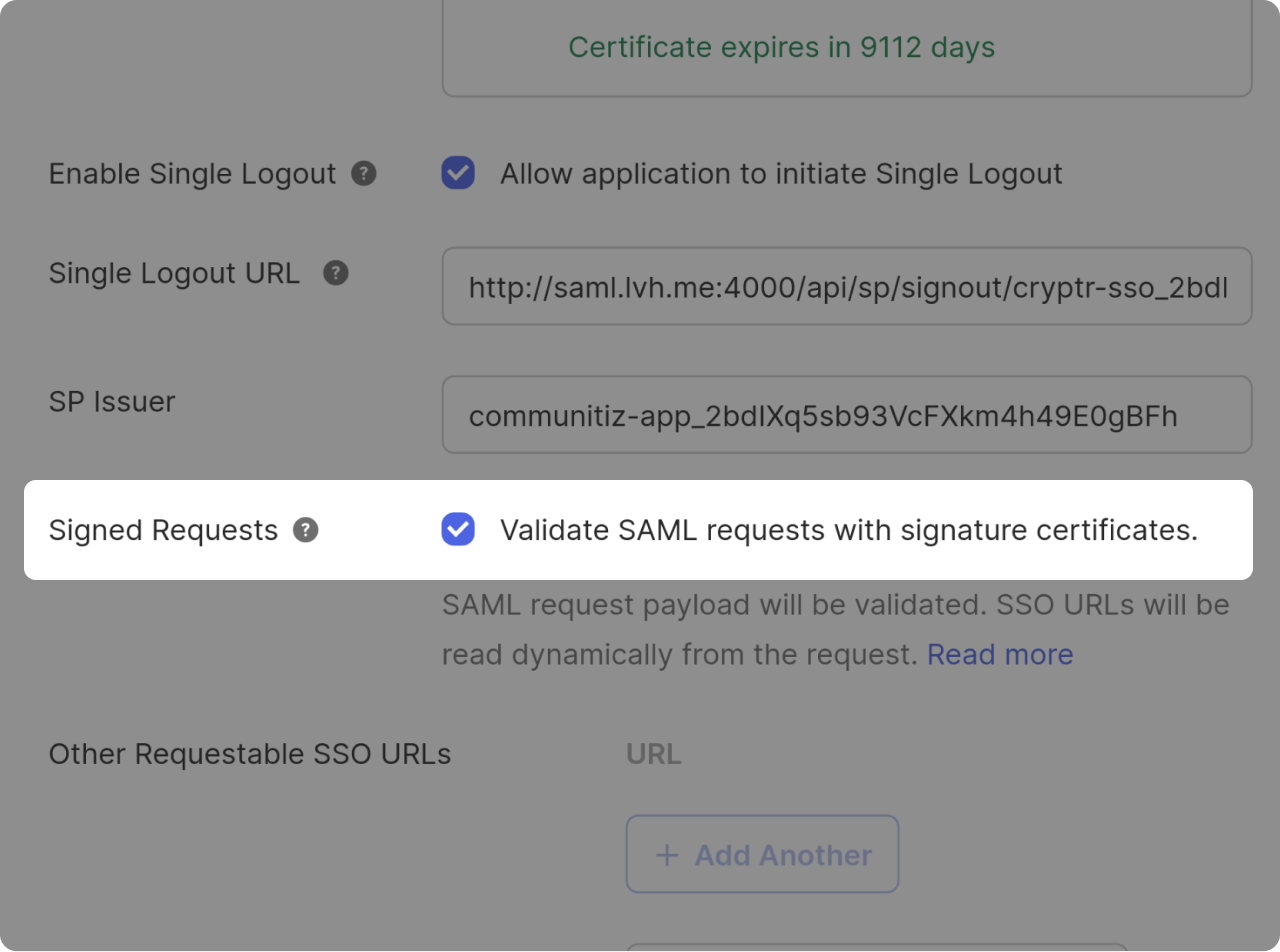
- Activate the "Validate SAML requests with signature certificates."
Attributes Mapping
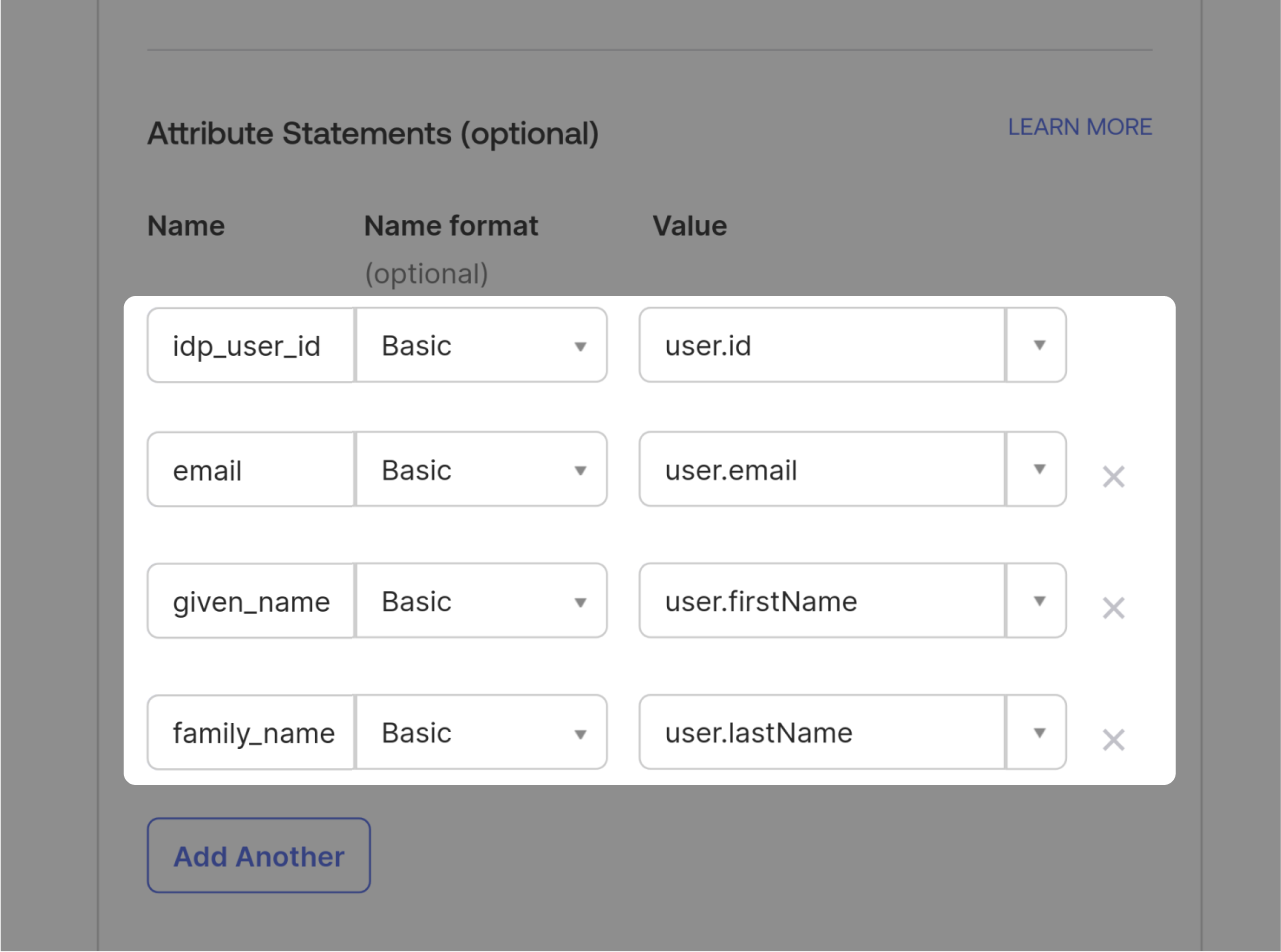

In the "Attribute Statement" section, please fill out the fields as shown above.
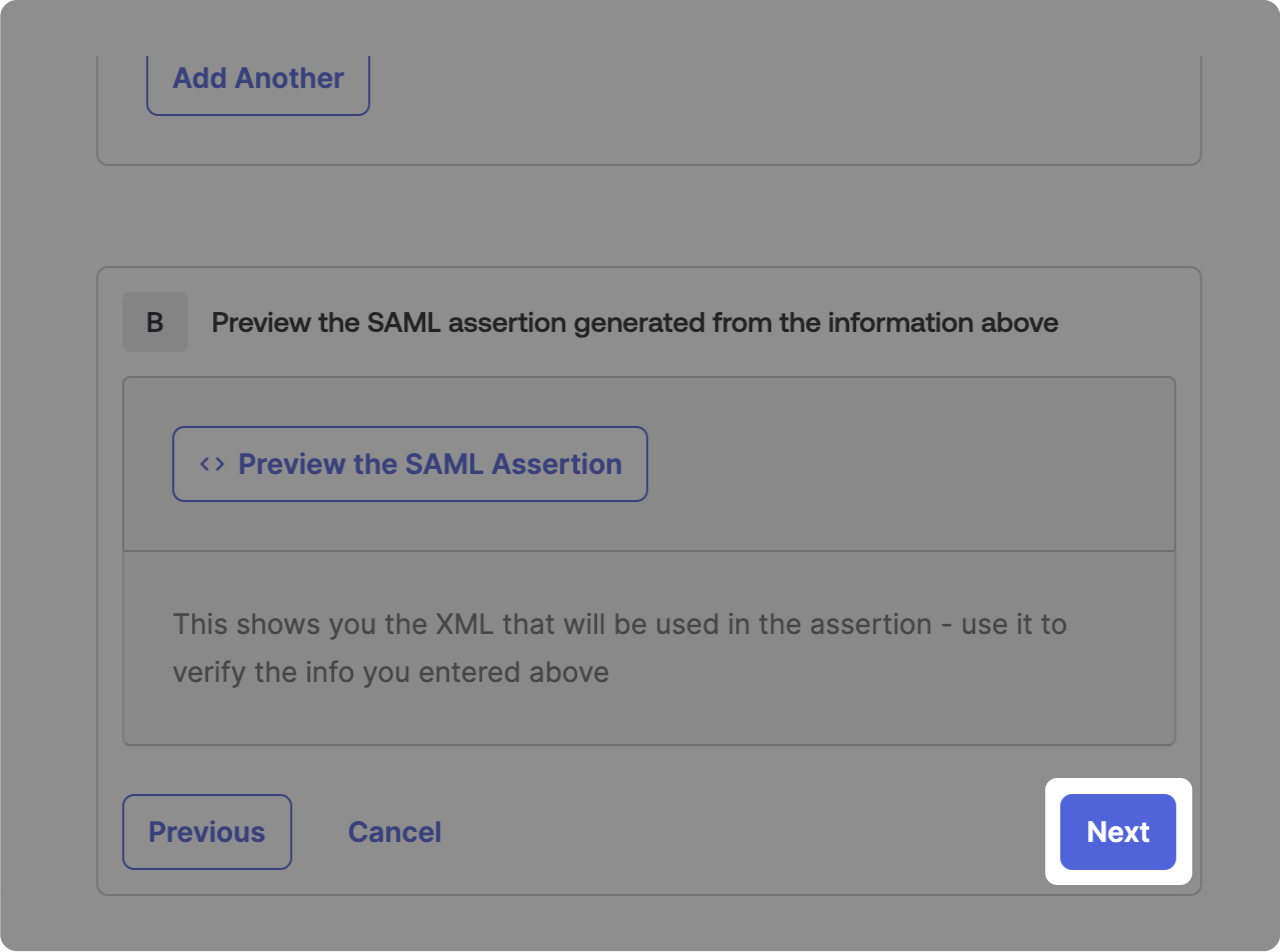
After proceeding by clicking on "Next," you will be redirected to the "Feedback" step.
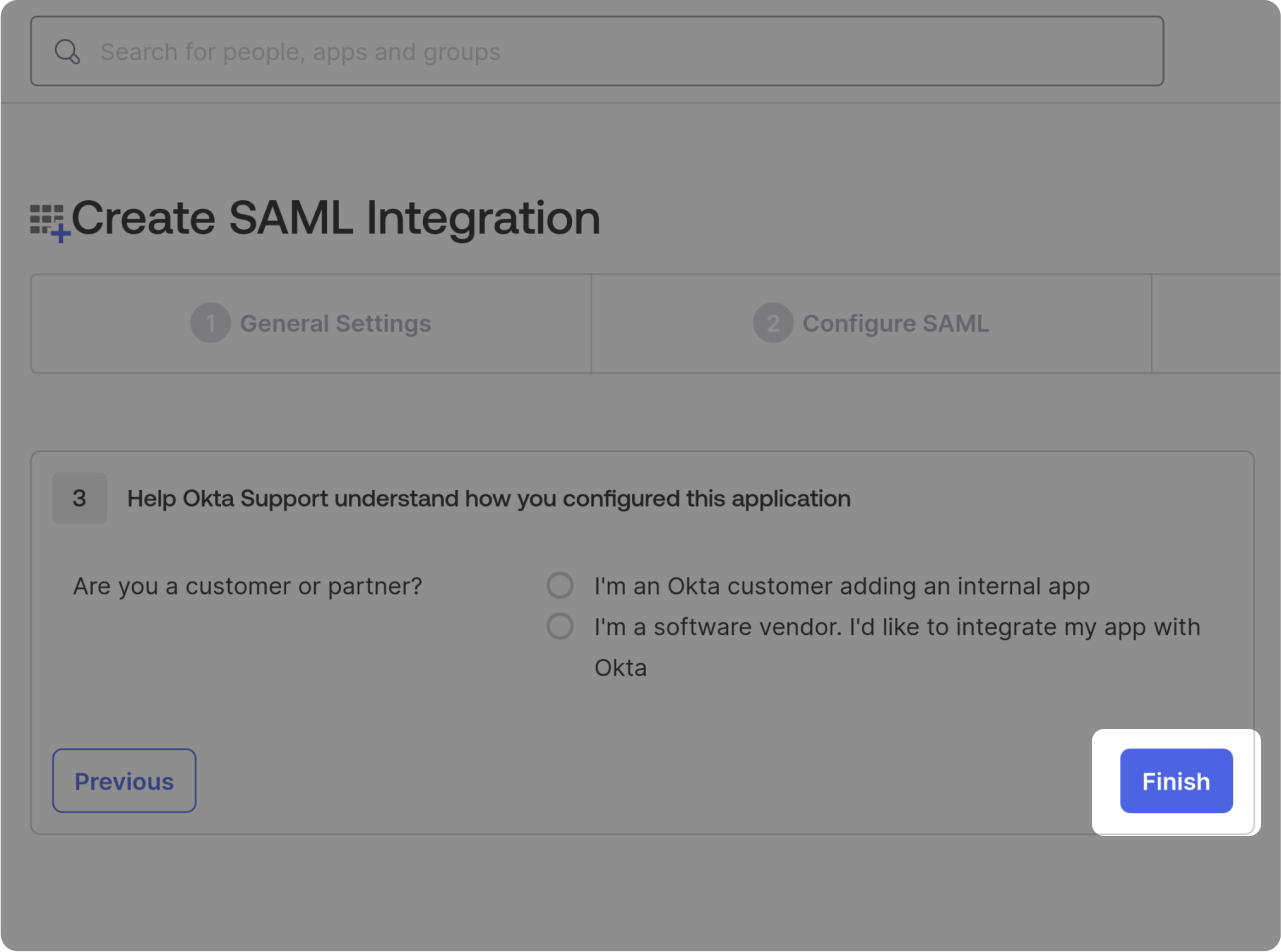
On this screen, select the option that is most suitable for you and then click on "Finish."
XML Metadata file
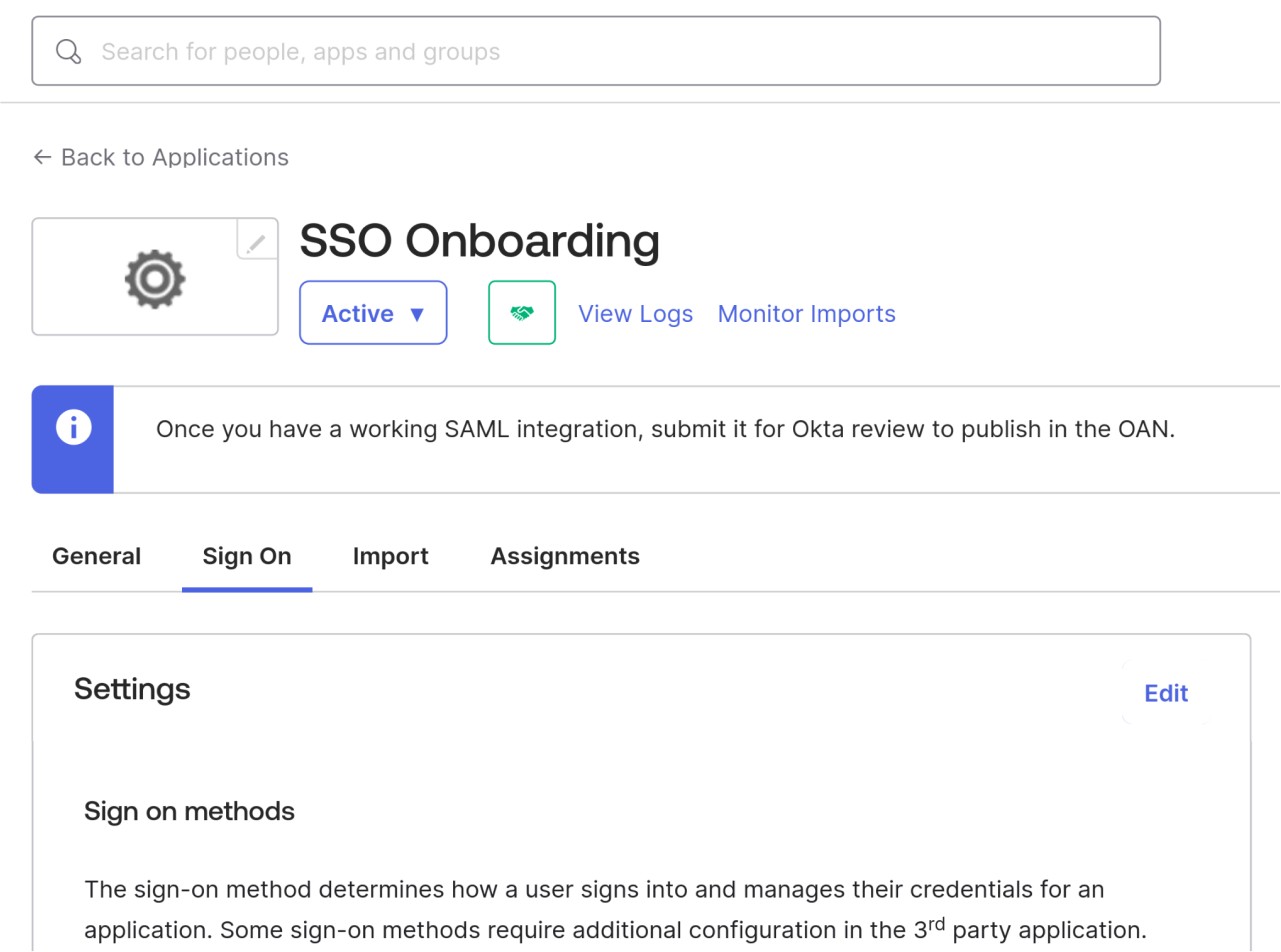
You should now see the "Sign On" tab of your newly created application.
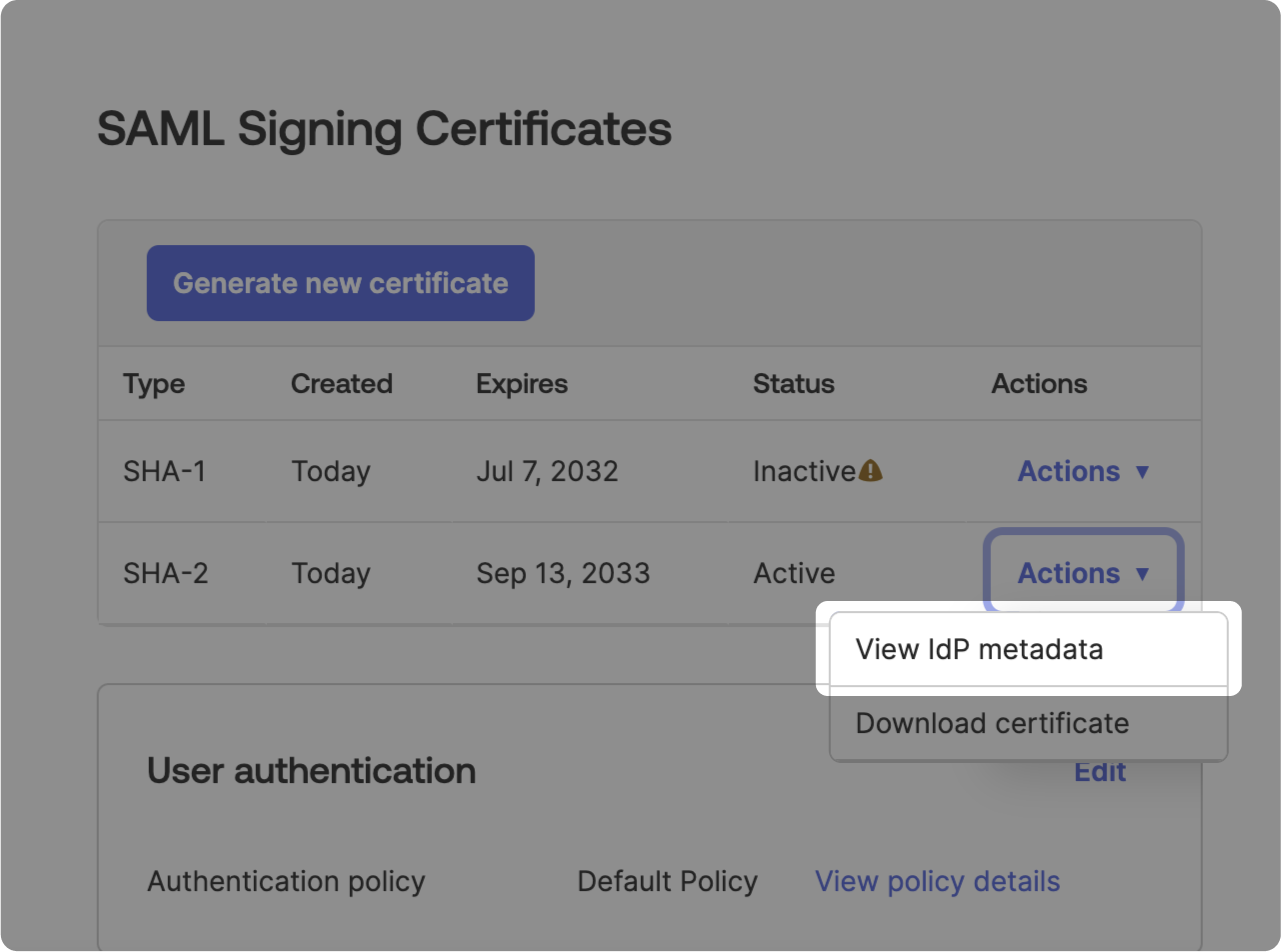
- Scroll down to "SAML Signing Certificates."
- Click "View IdP metadata" for "SHA-2" (opens in a new tab).
- Right-click to "Save" the XML metadata file or copy the link if you prefer.

Upload your downloaded XML metadata file.
Users and groups
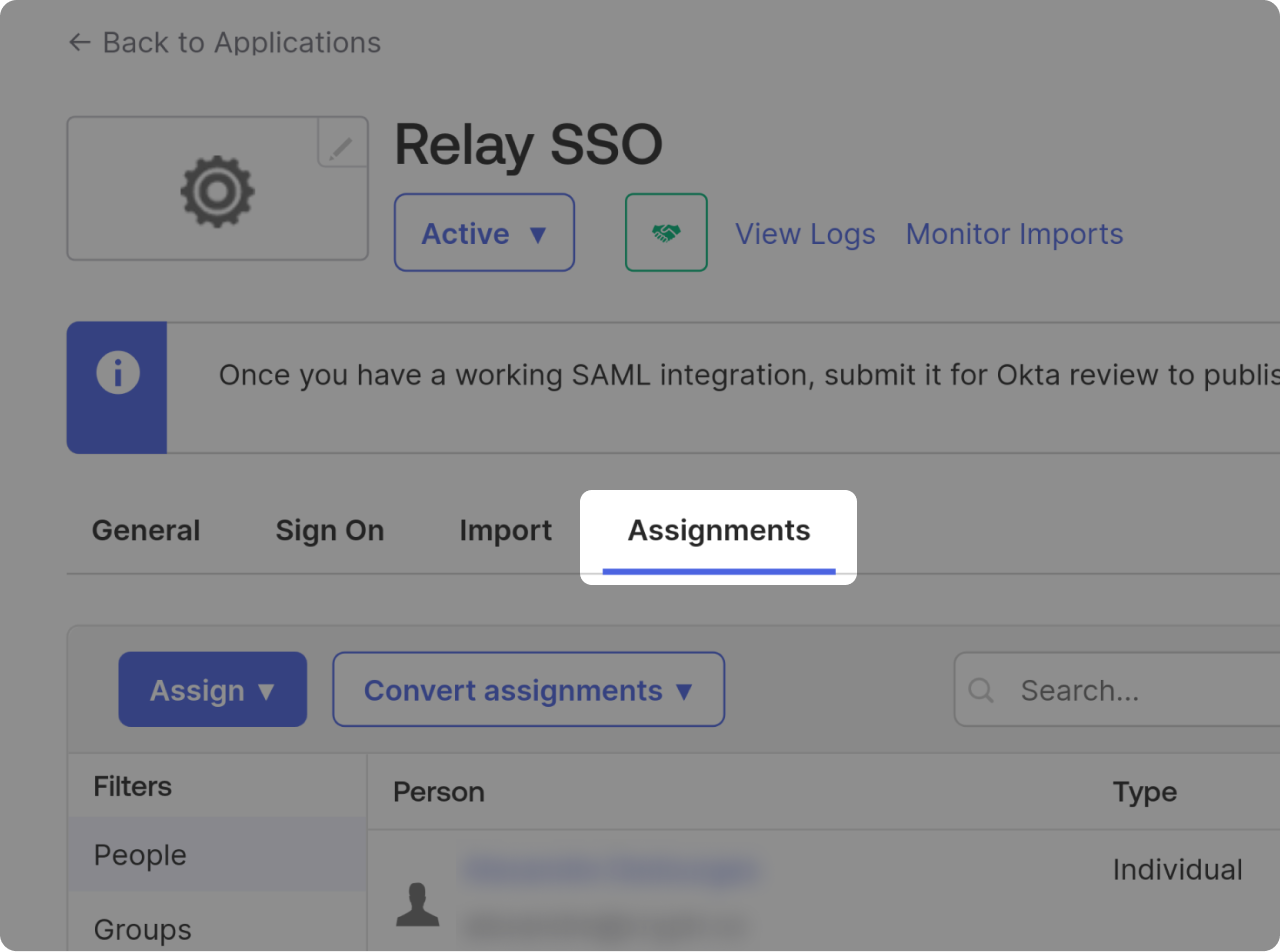
In your app, go to "Assignments."
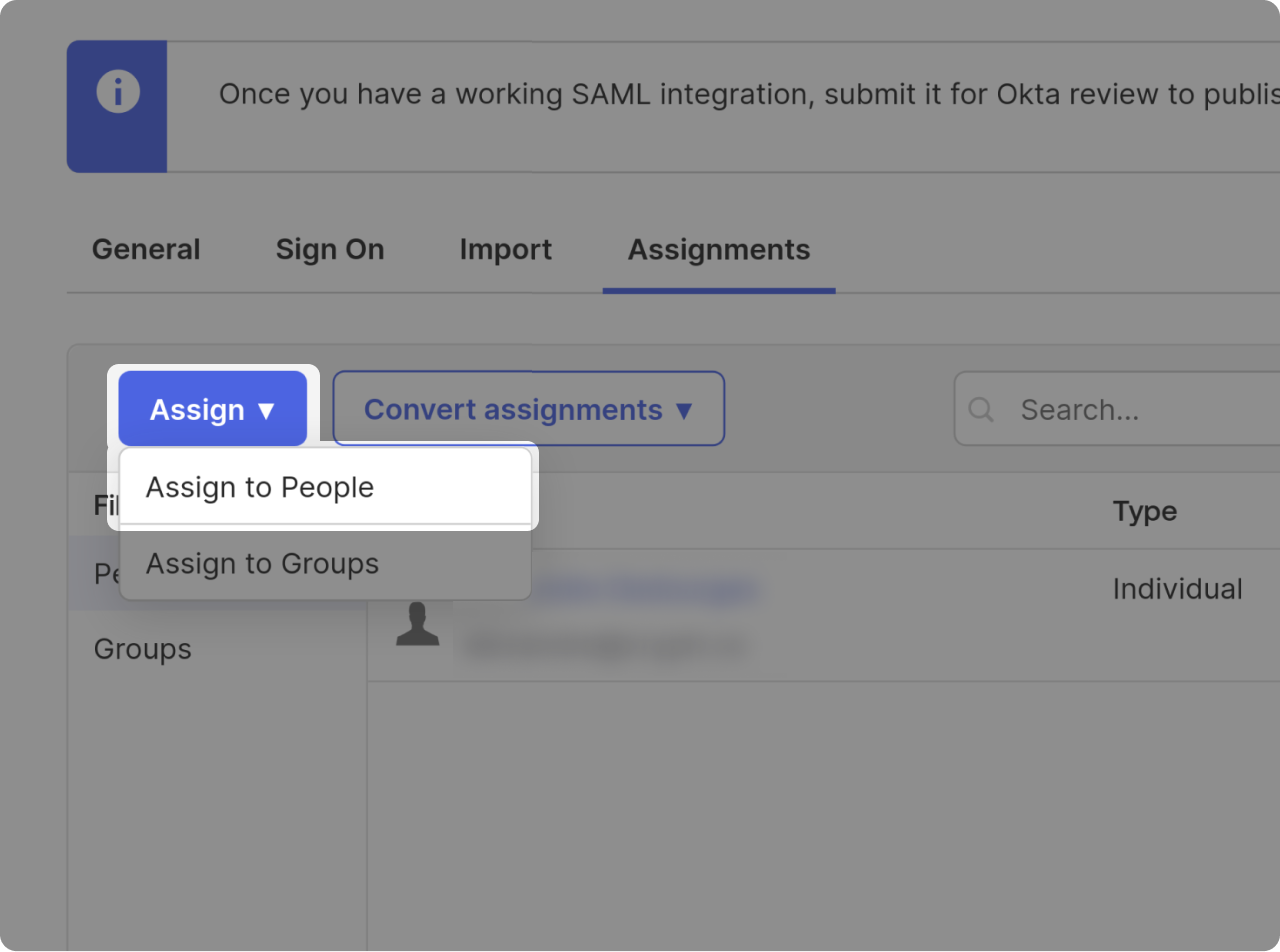
Click on "Assign" > "Assign to People."
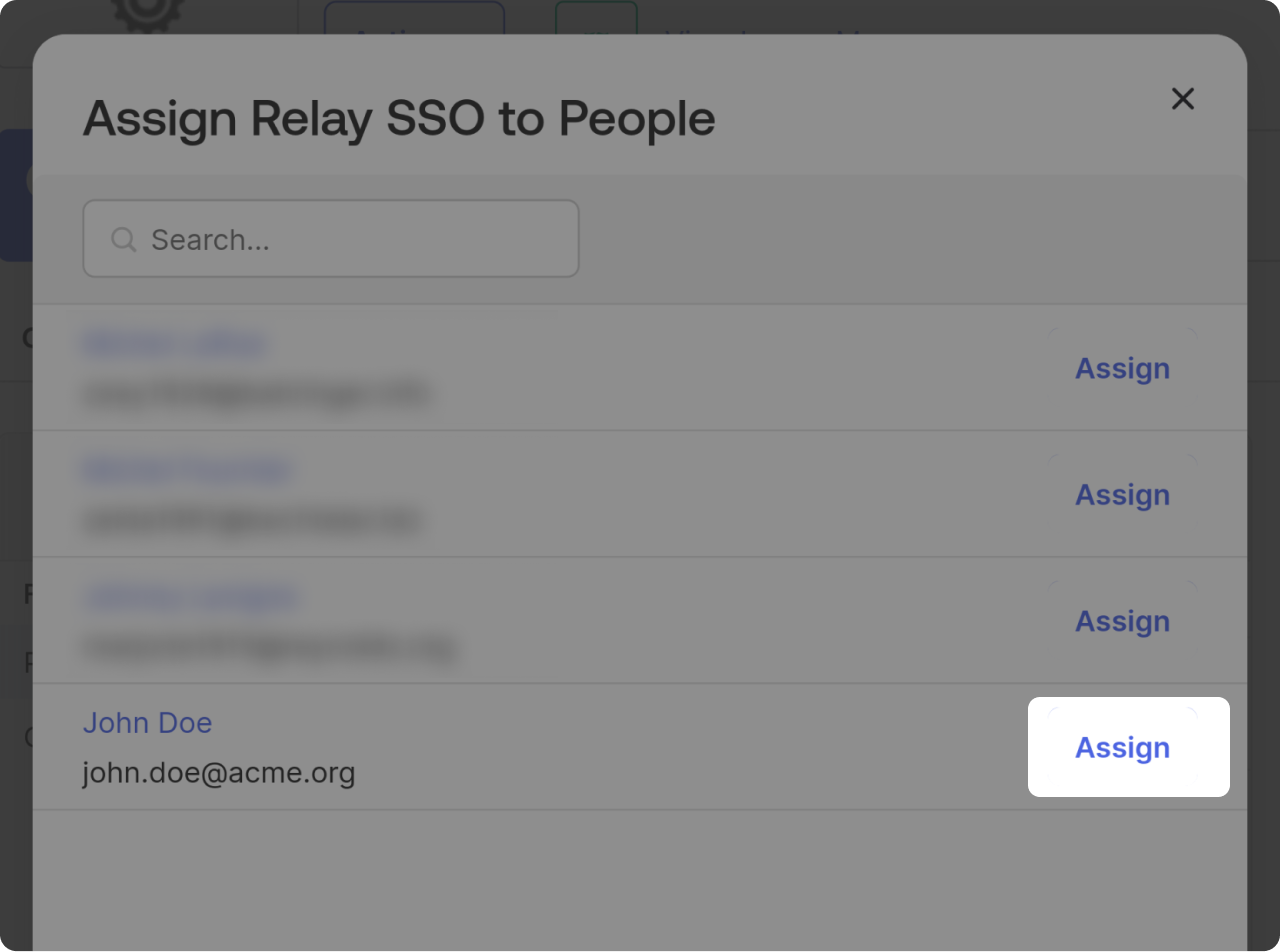
On the right of the user you want to assign, click on "Assign."
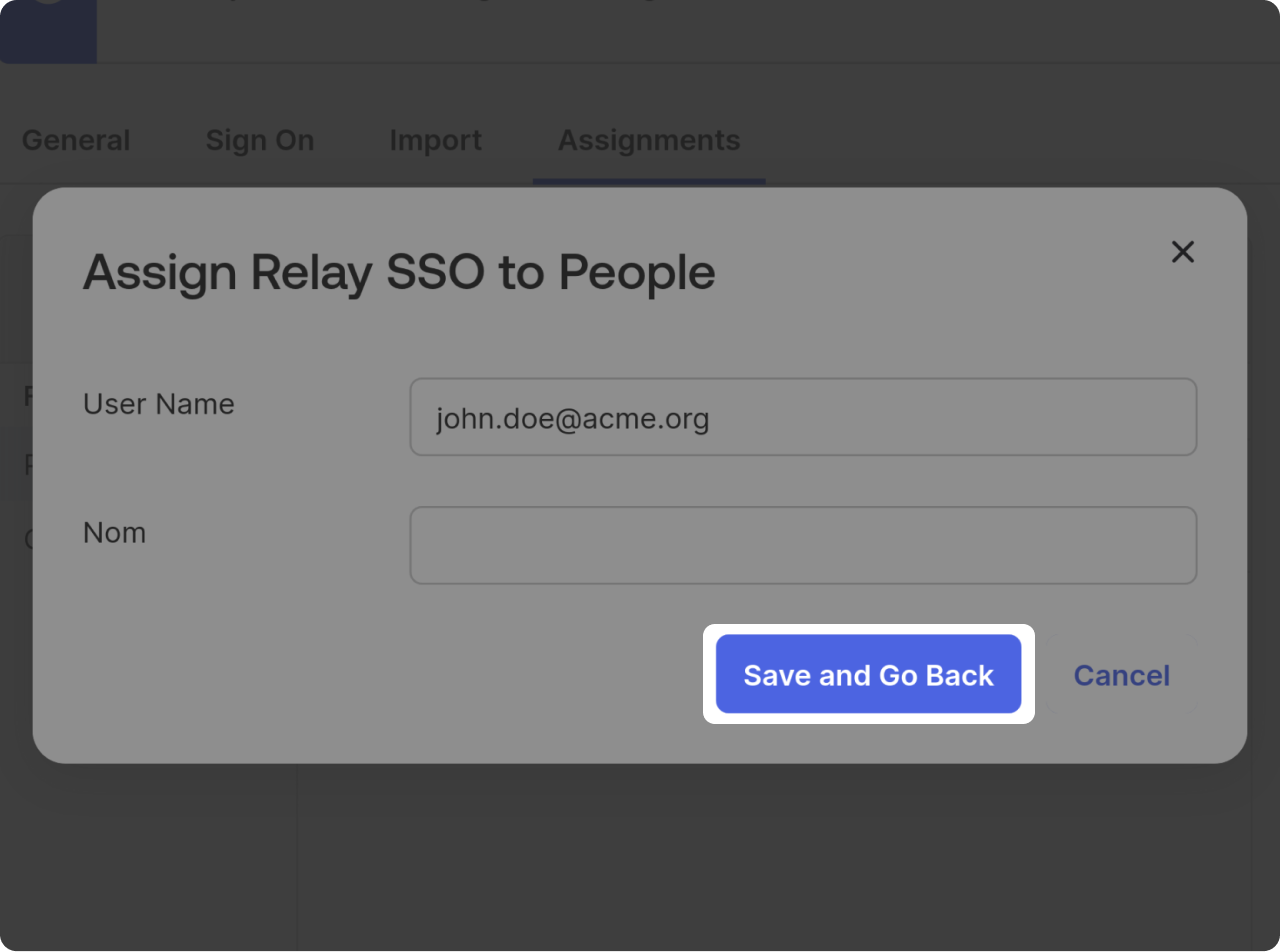
On this screen click on "Save and Go Back."
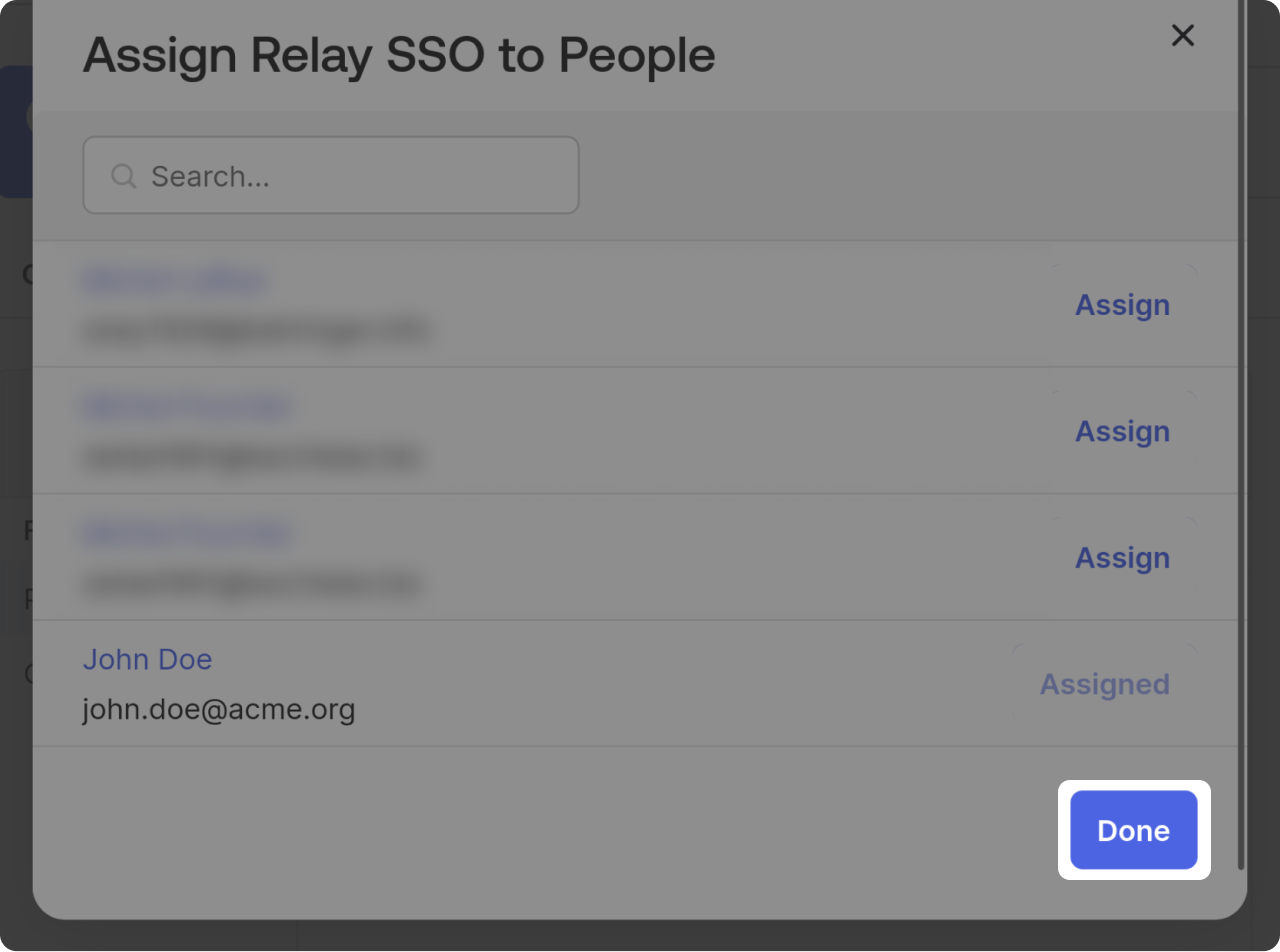
Once you selected all the users you wanted, click on "Done."
Test SSO login
Test SSO login