ADFS
Discover step-by-step instructions on configuring a connection with ADFS. Learn how to integrate your application with ADFS for secure and streamlined SSO authentication.
Create new Relying Party
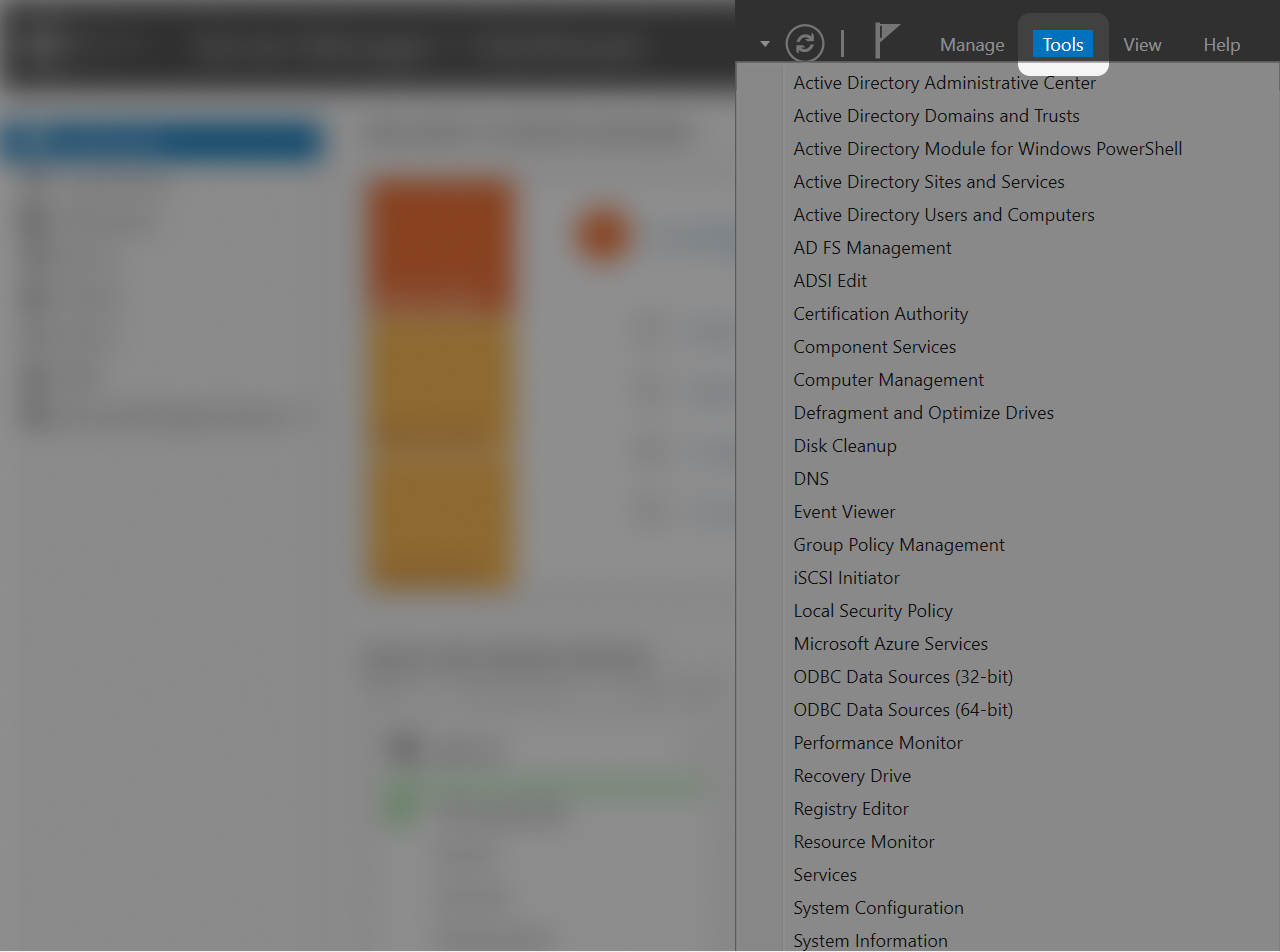
- Access your Windows Server & Open Server Manager
- Click on "Tools"
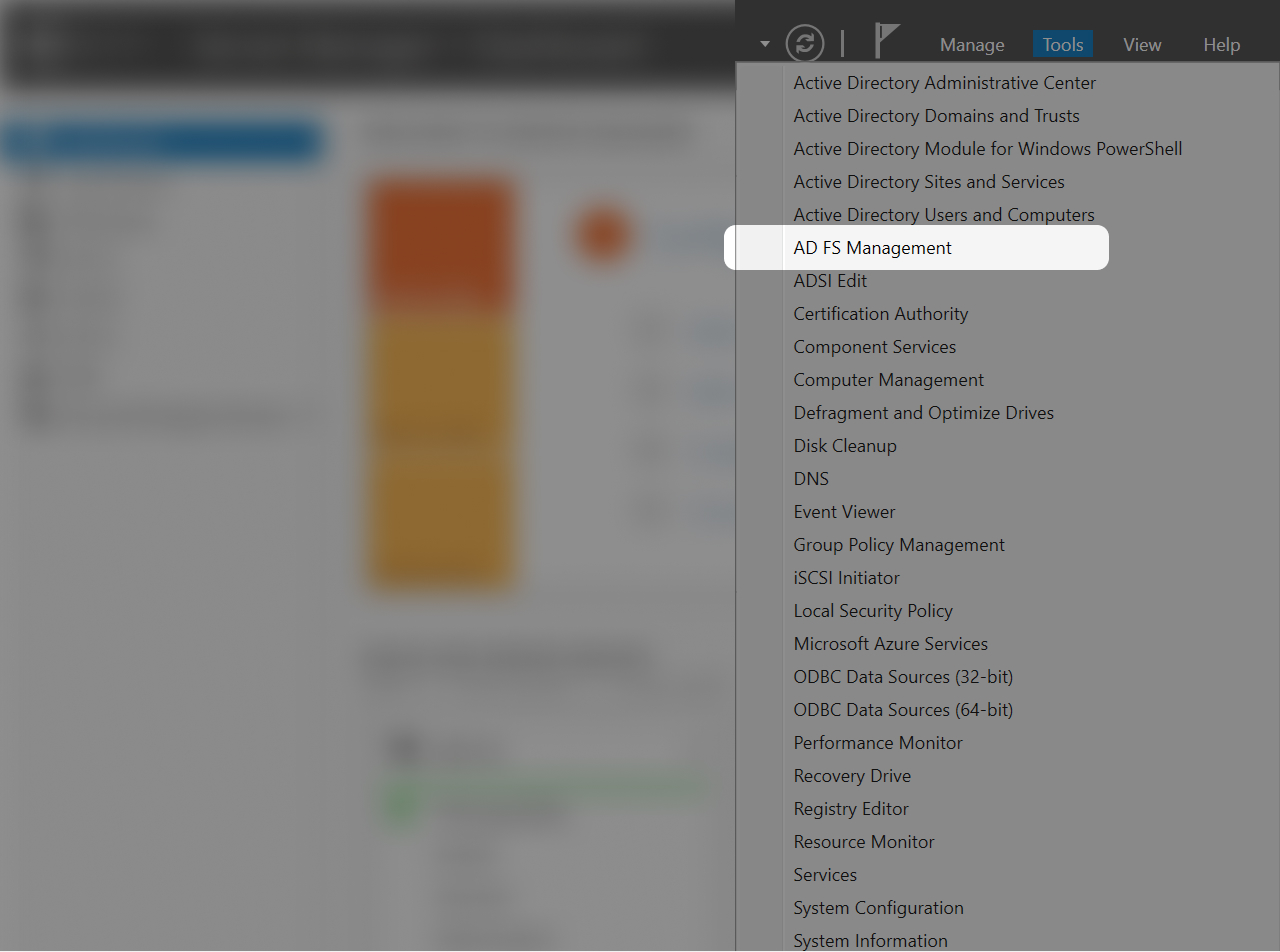
Access AD FS Management
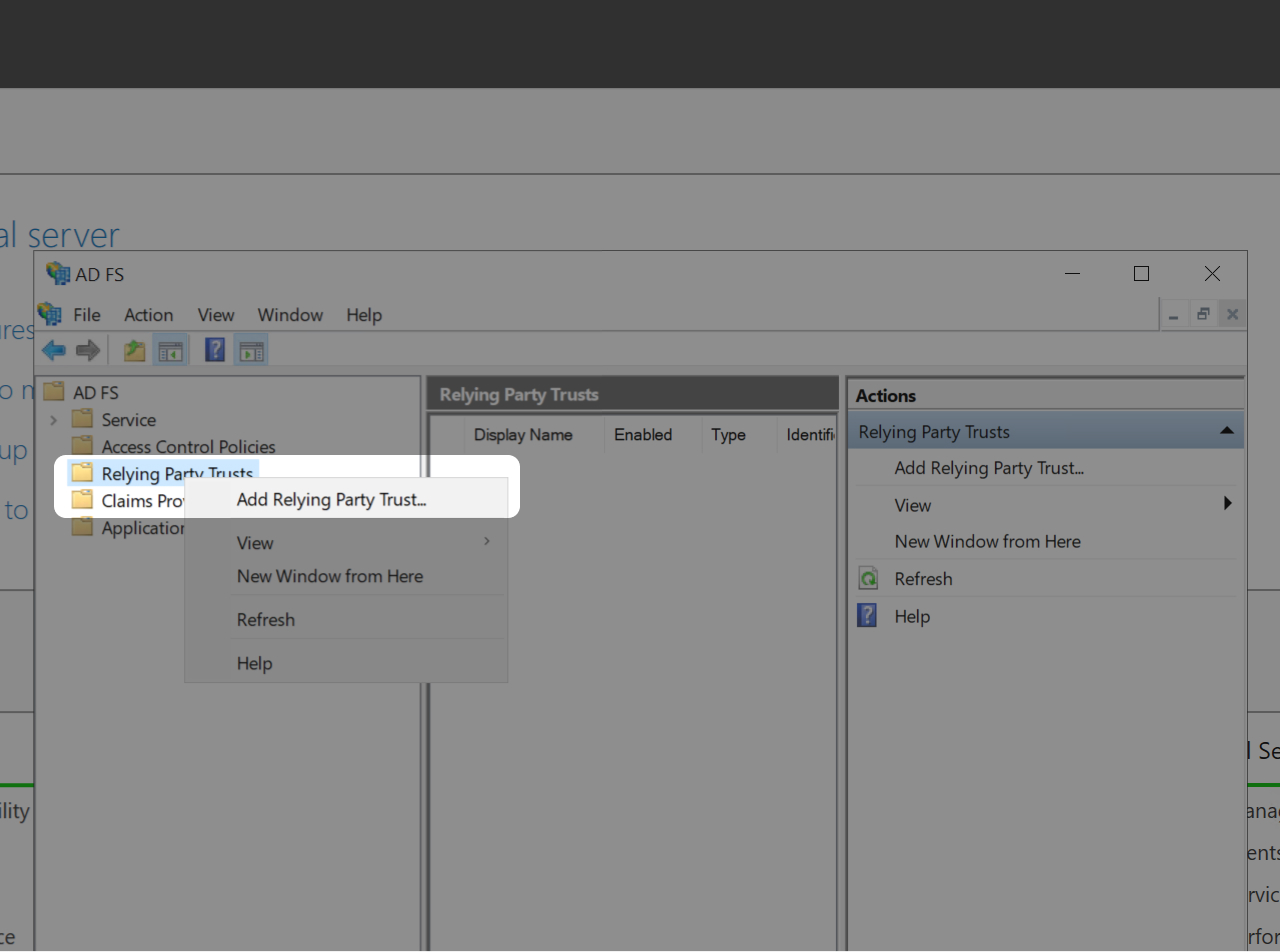
- Click on "Relying Party Trust"
- Once "Relying Party Trust" is highlighted, right click on it.
- Click on "Add Relying Party Trust"
Relying Party Trust Wizard
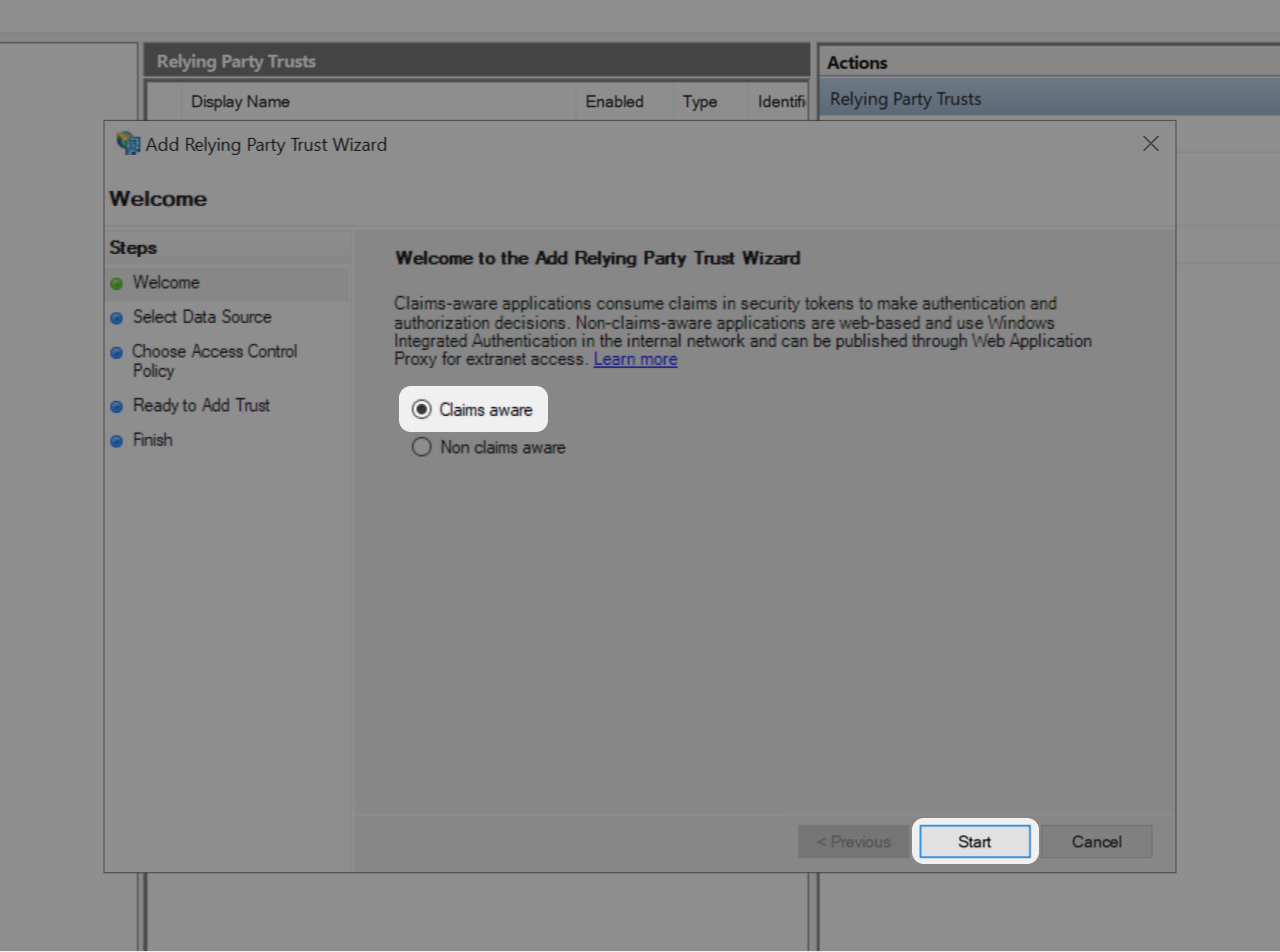
- In the Relying Party Trust Wizard select "Claims aware"
- Then click on "Start"
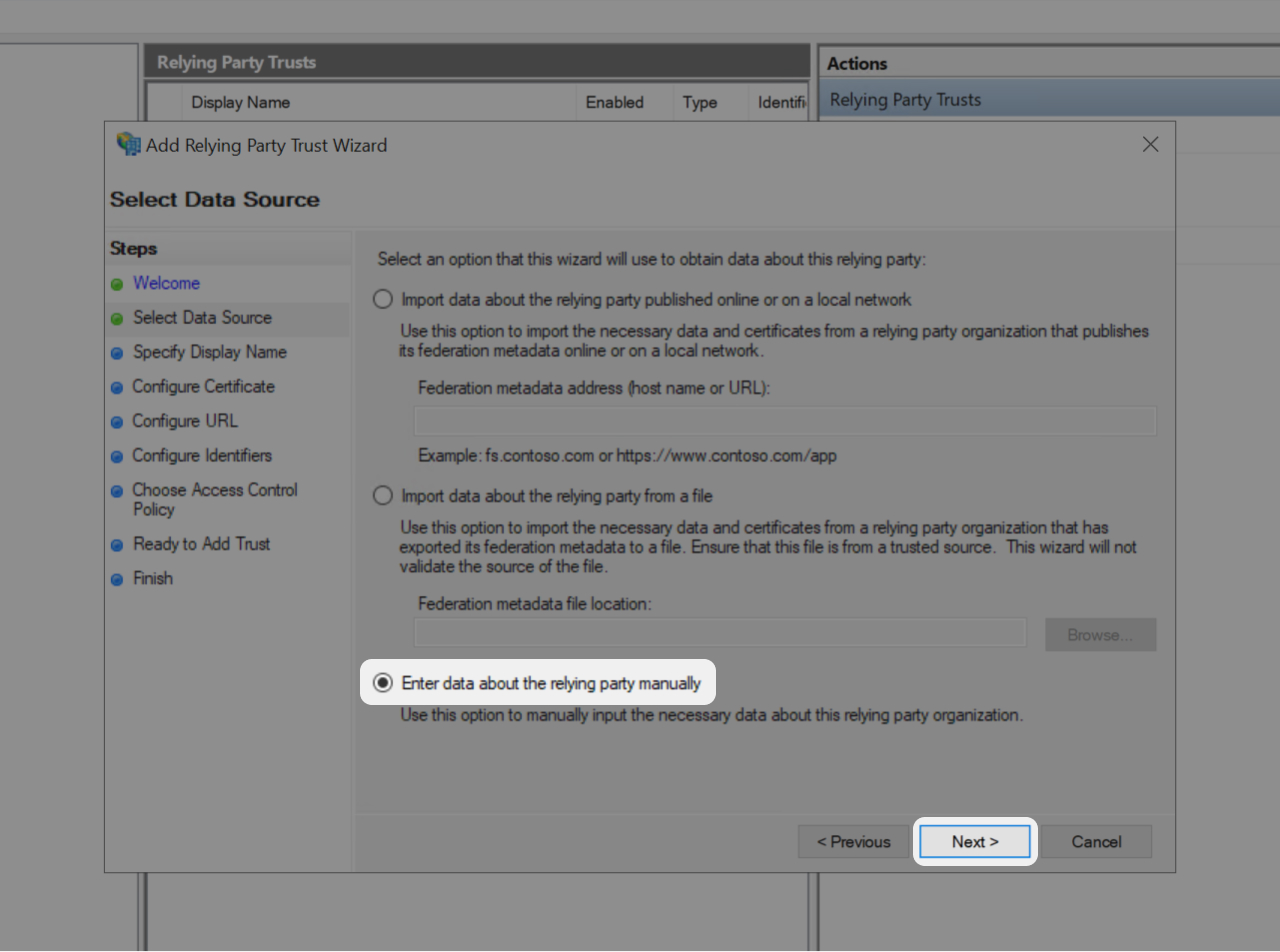
- You're invited to select the Data Source, select: "Enter data about the relying party manually"
- Click on "Next"
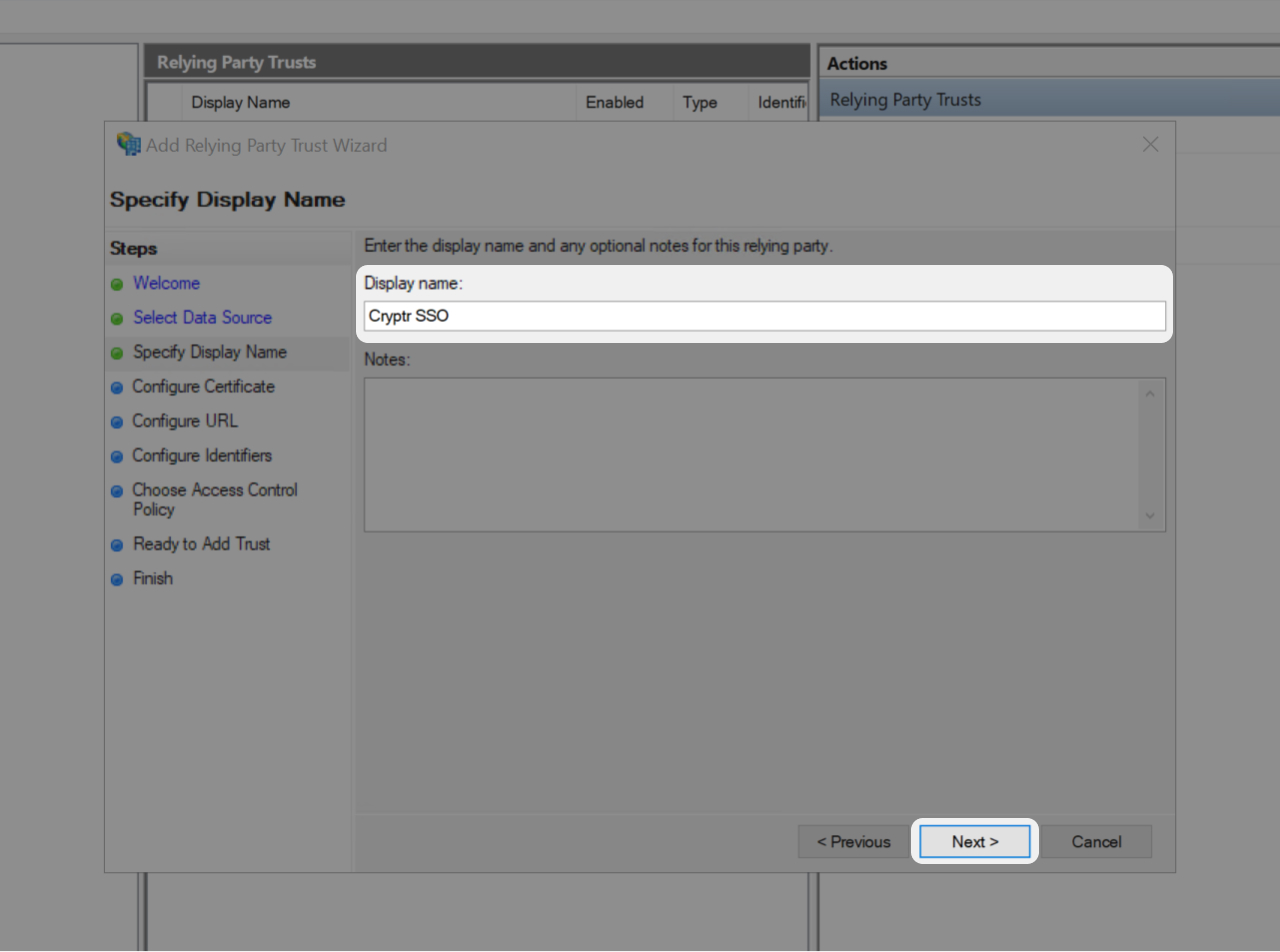
- Set a Display name
- Add notes if you wish to
- Then click "Next"
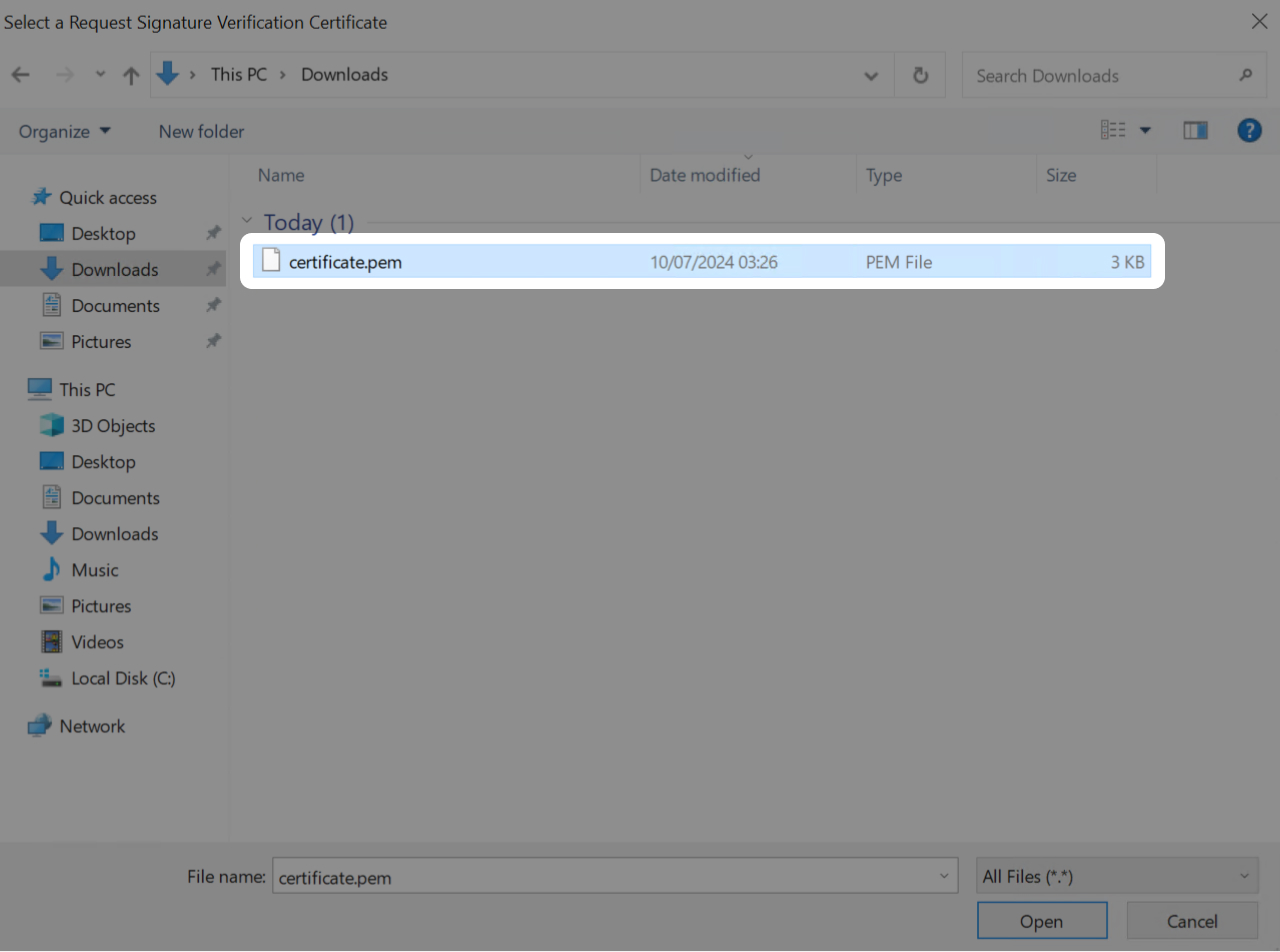
Click on "Download Certificate" button at the right of this wizard
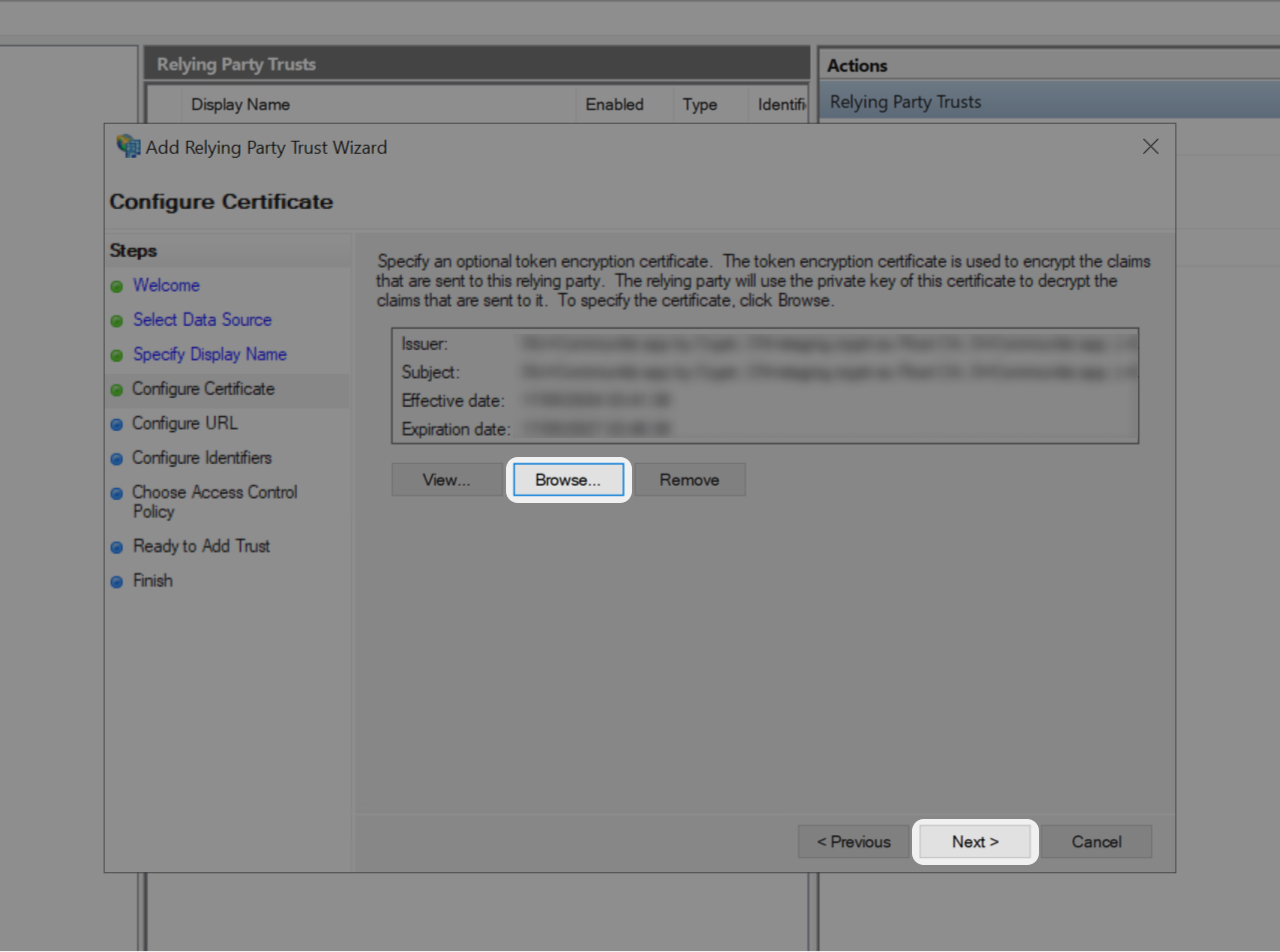
- Now in the Relying Party Trust Wizard click on "Browse"
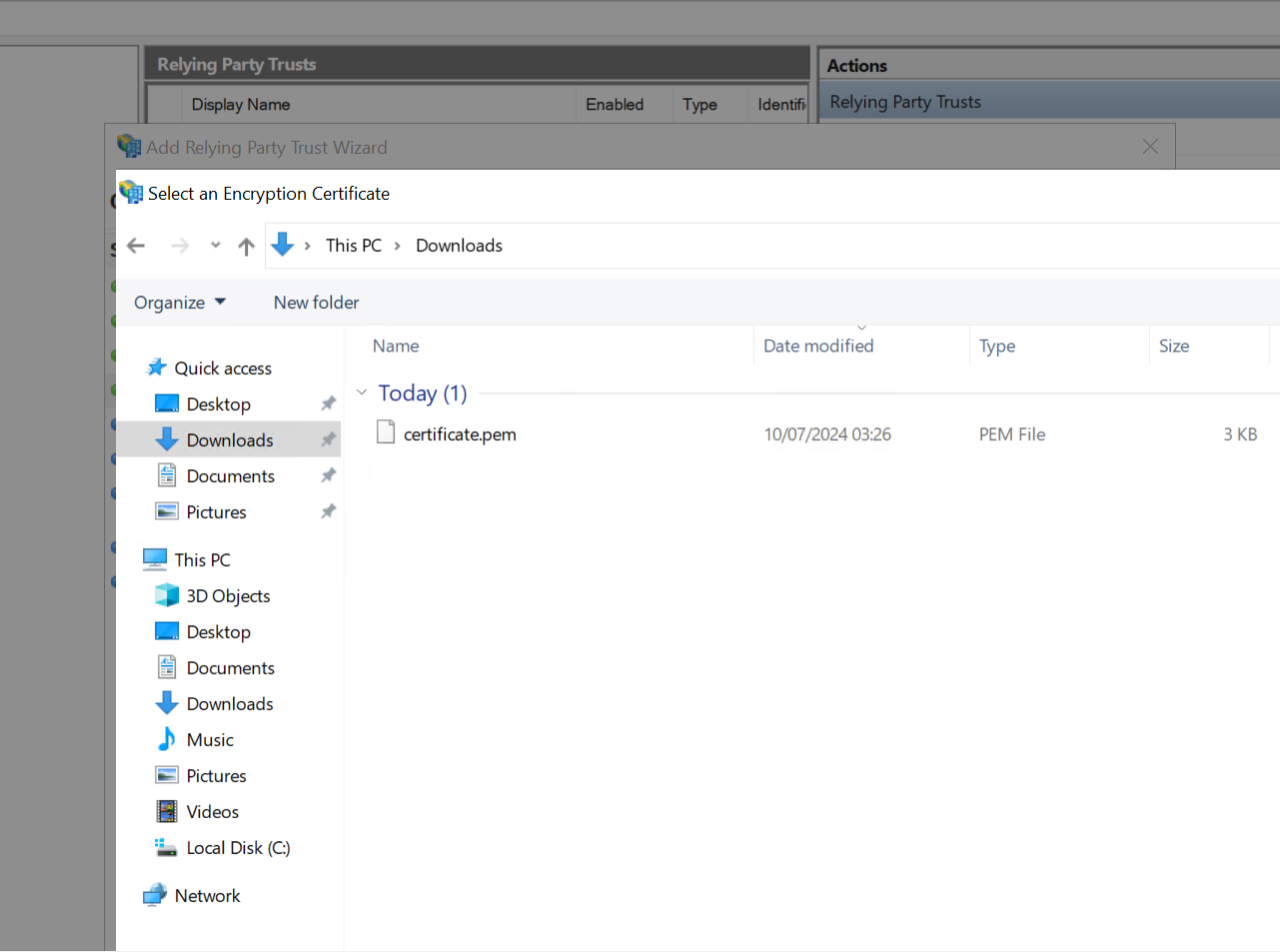
- Upload downloaded certificate, then click "Next"
TIP 💡 : If the downloaded file doesn't appears in your Files Manager, select "All files
*.*" to find the PEM certificate file on your machine
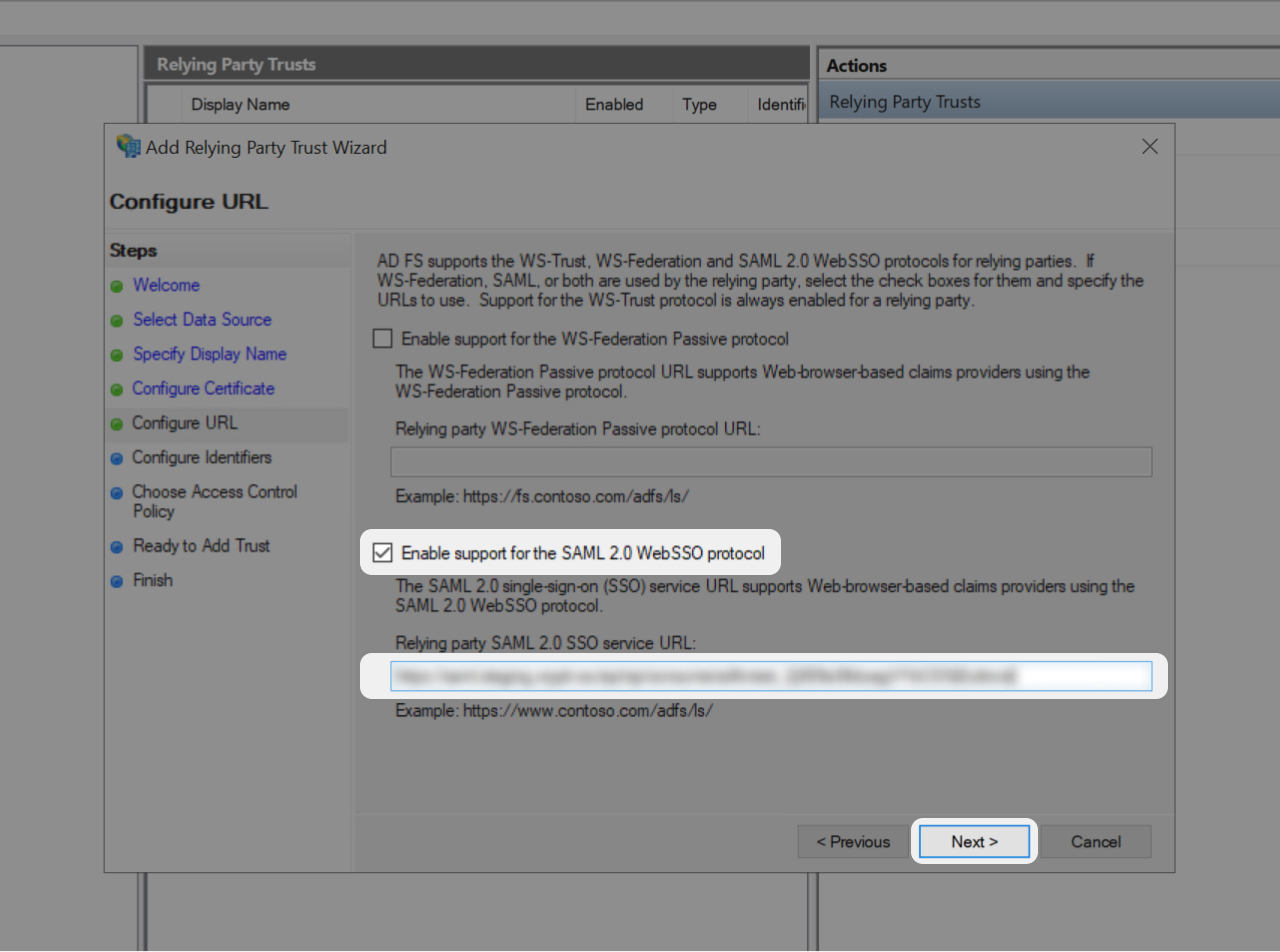
- On the URL Configuration Screen: check "Enable support for the SAML 2.0 Web SSO protocol"
- Paste "Relying party SAML 2.0 SSO servicer URL" value you find in the right side of this tutorial 👉
- Paste it into the corresponding field on your ADFS and click "Next"
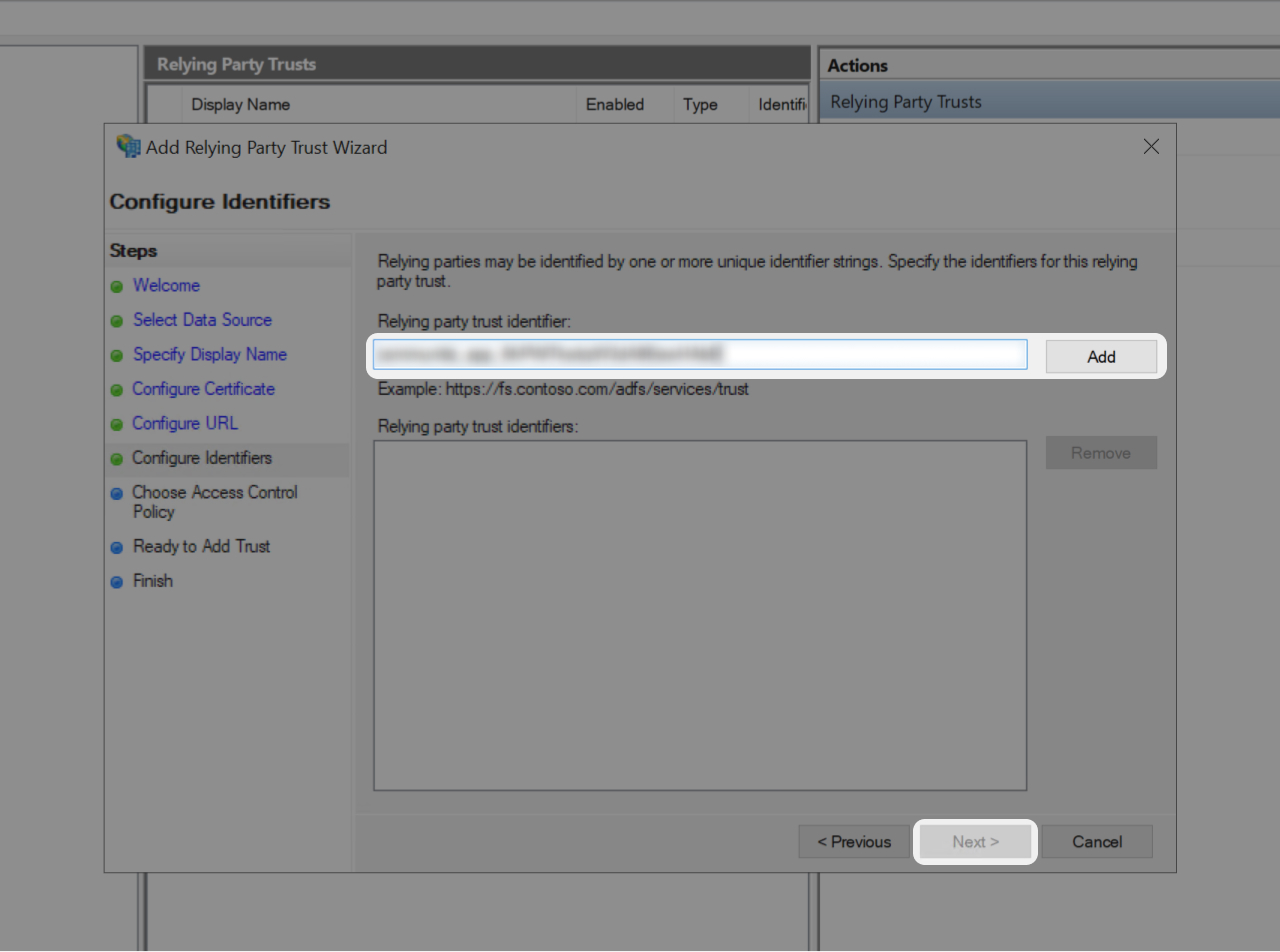
- Copy "Relying party trust identifier" value you find in the right side of this tutorial 👉
- Paste it into the corresponding field on your ADFS.
- Click "Add" and "Next"
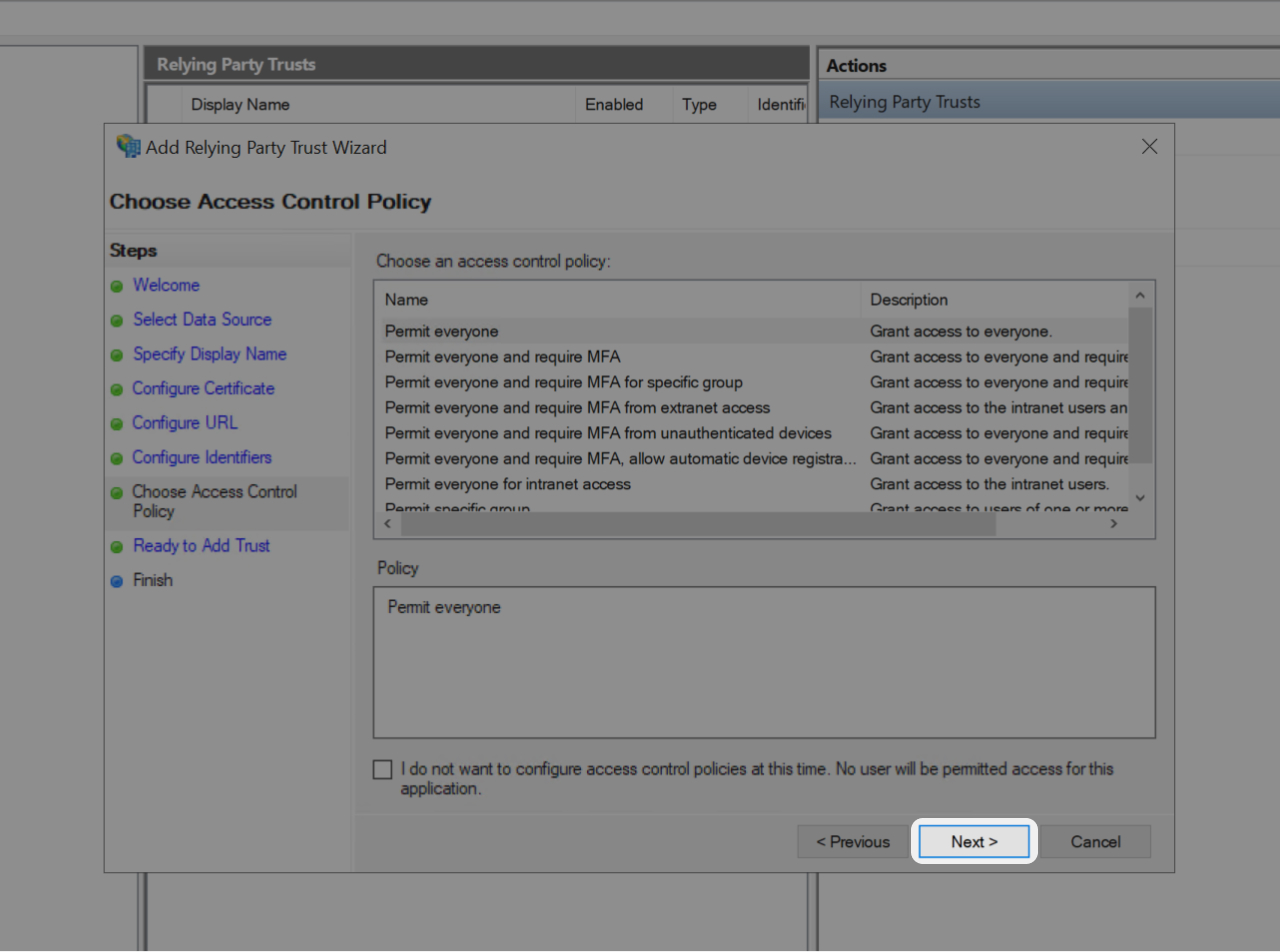
- You're now invited to select the Access Policy you want
- After your choice click "Next"
- Review all setup in tabs then click "Next"
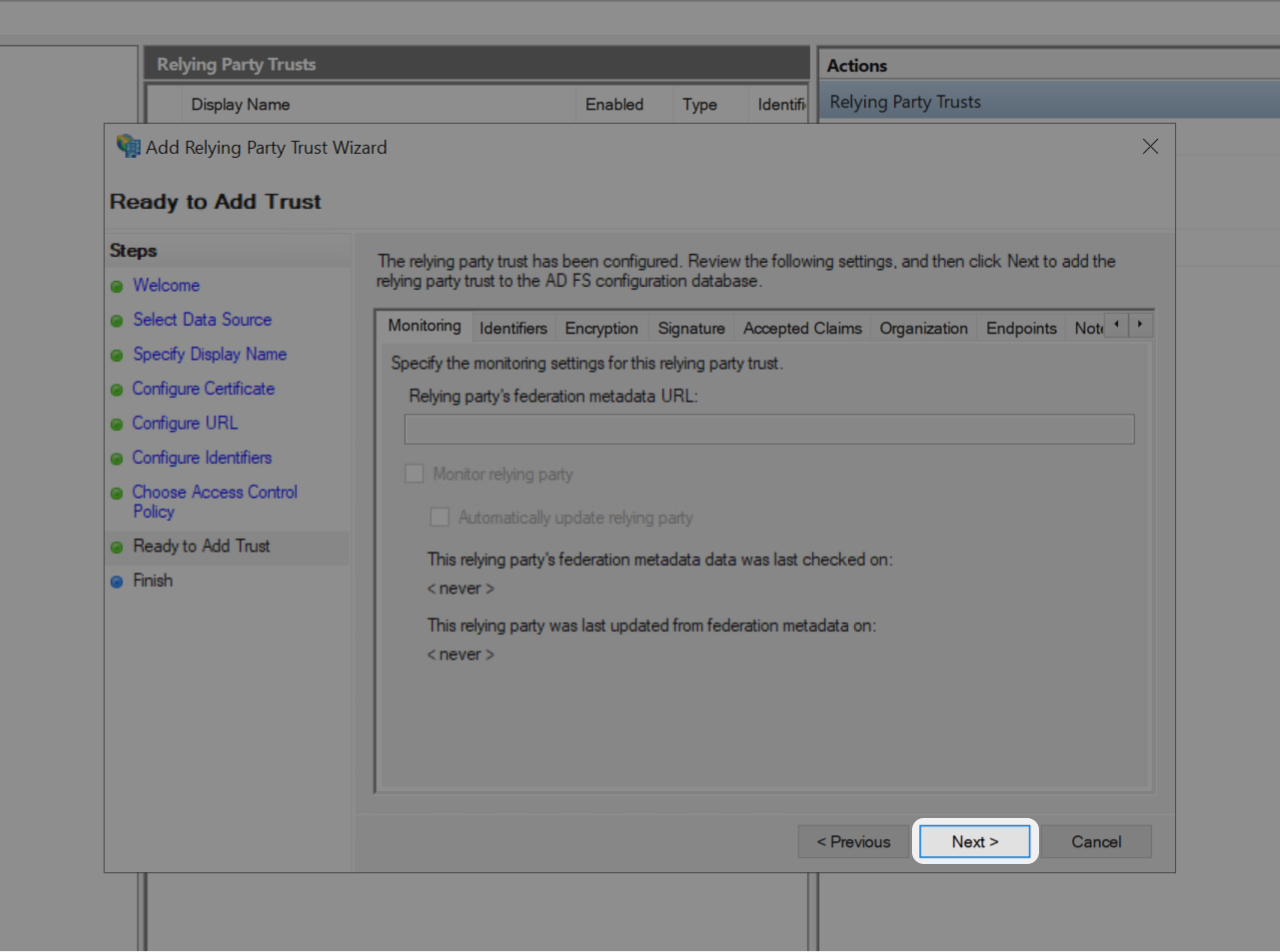
Review your Relying Party Trust settings and click "Next"

In the final wizard screen uncheck the checkbox and click on "Close"
Edit Claim Issuance Policy
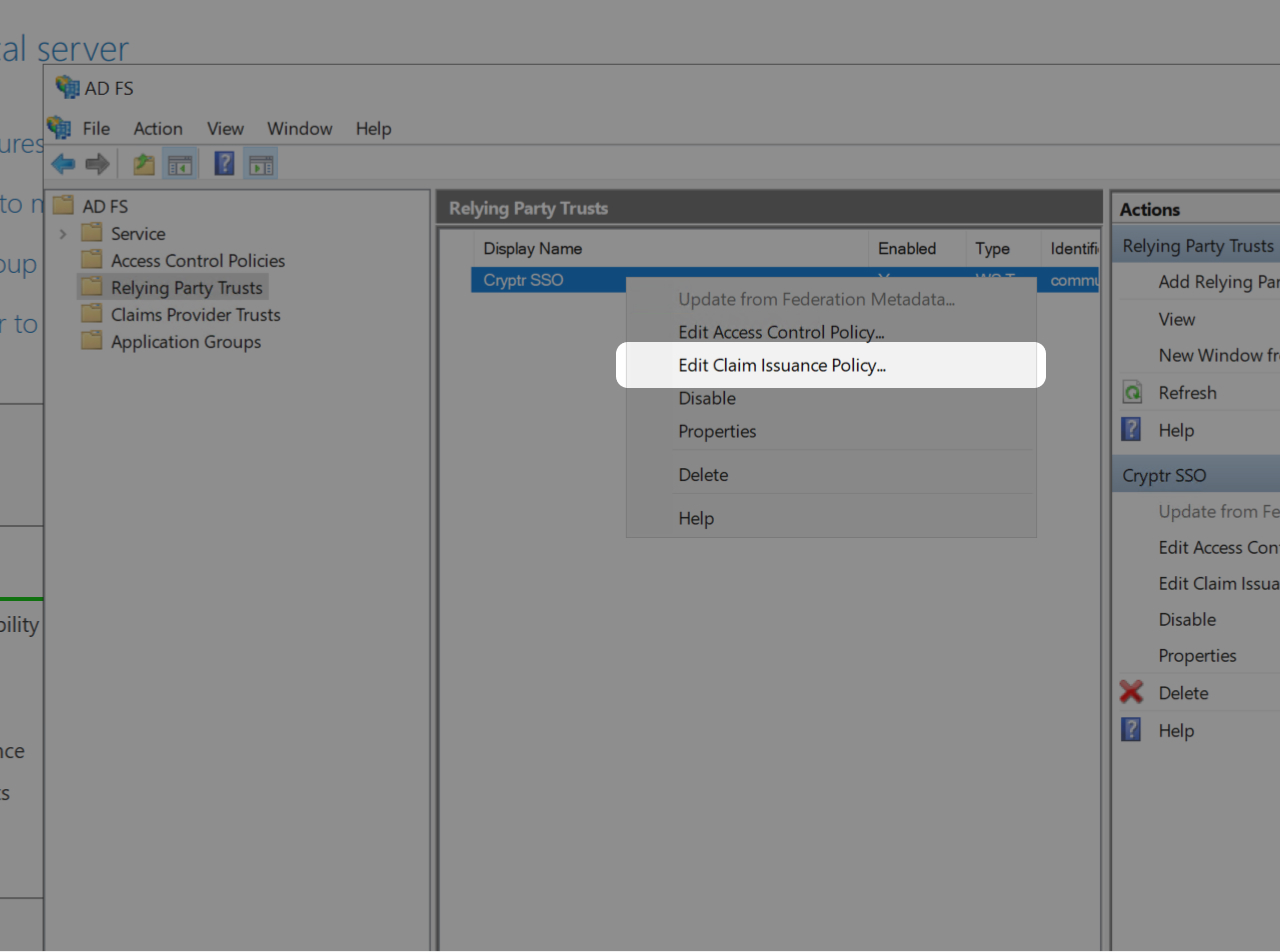
In your AD FS, right click on your newly created Relying Party then click on "Edit Claim Issuance Policy"
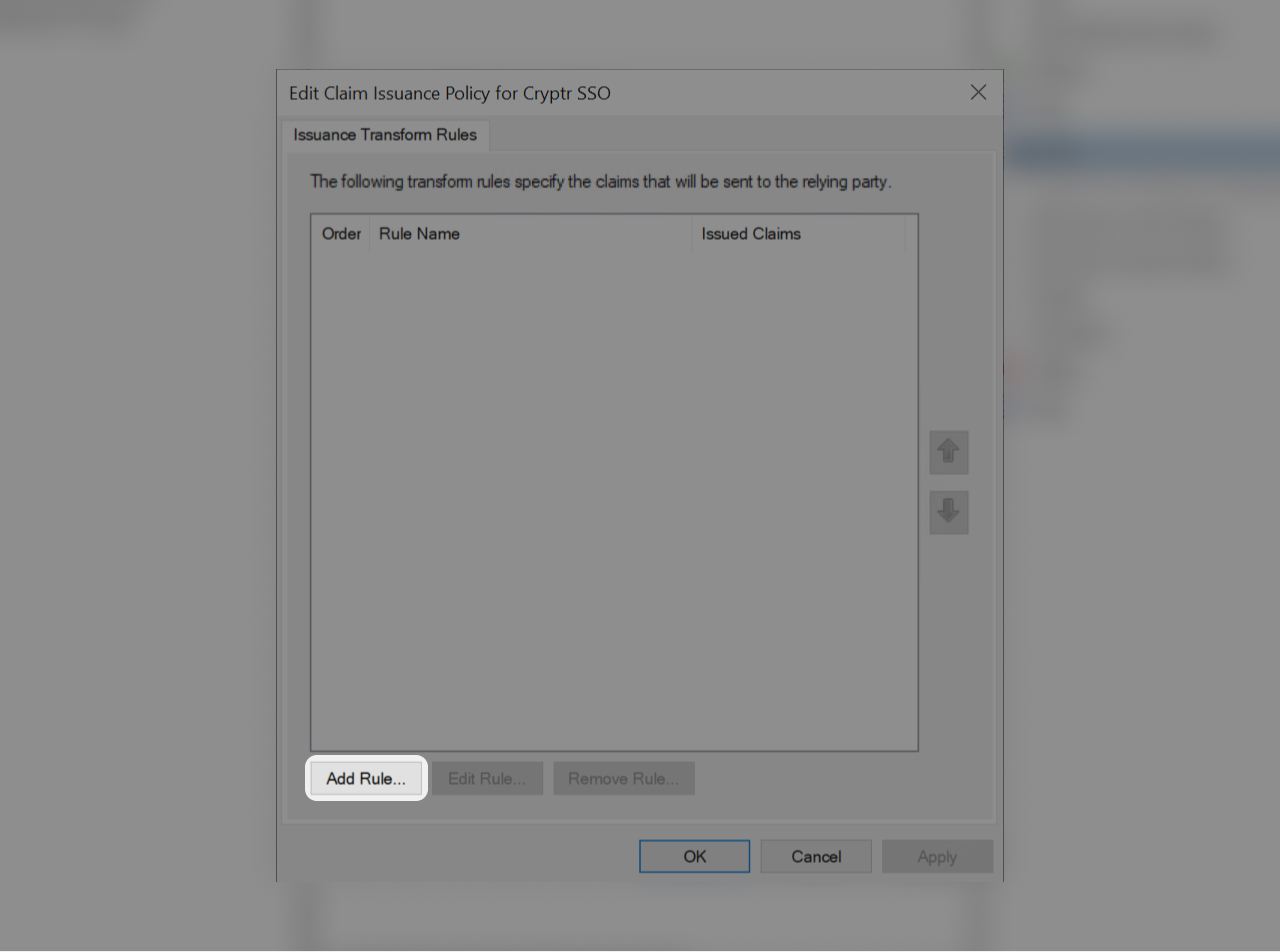
In the window that appeared click on "Add Rule..."

- Select "Send LDAP Attributes Claims"
- "Next"
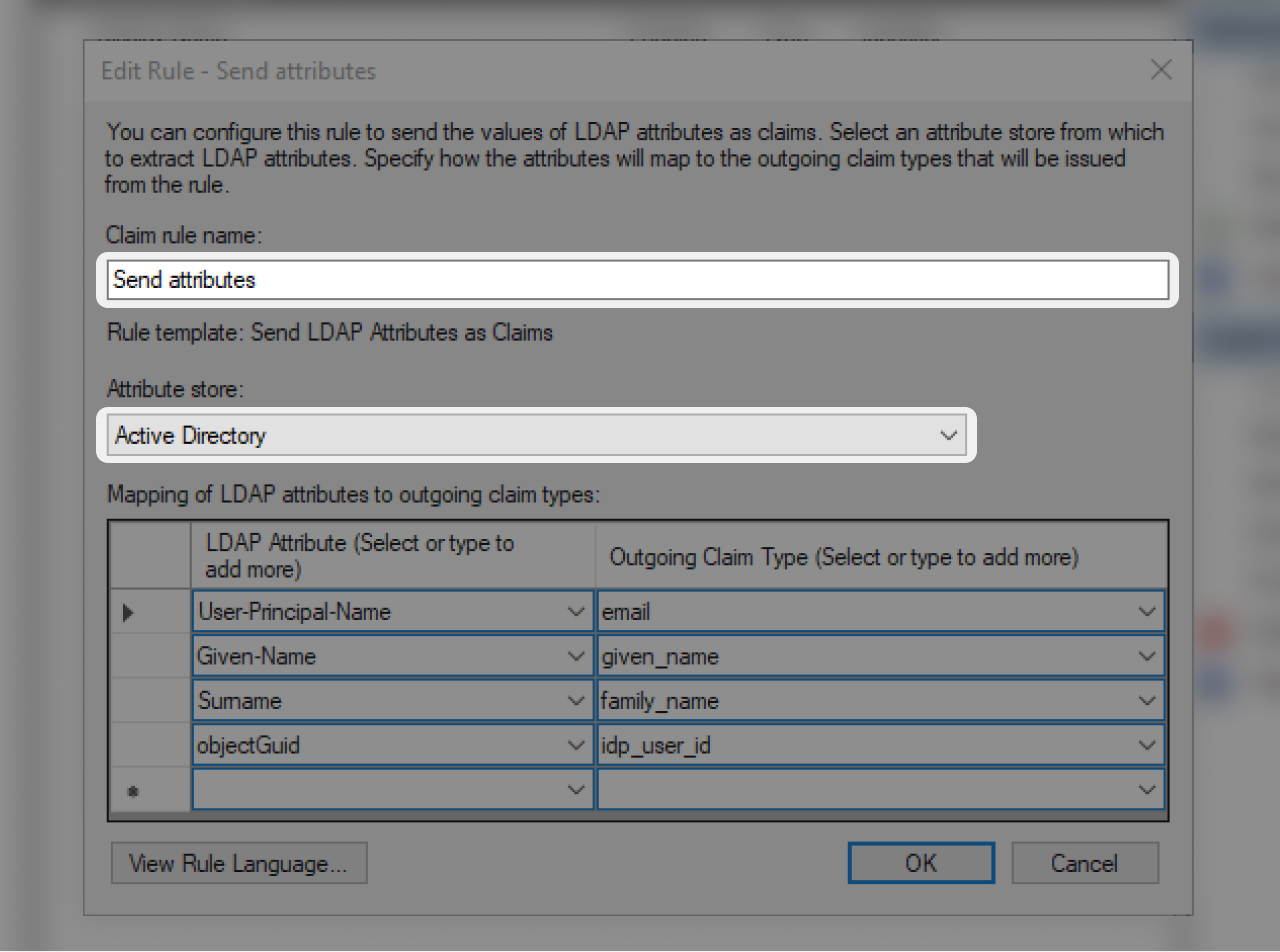
- In "Claim rule name":
Send attributes - In "Attribute store":
Active directory
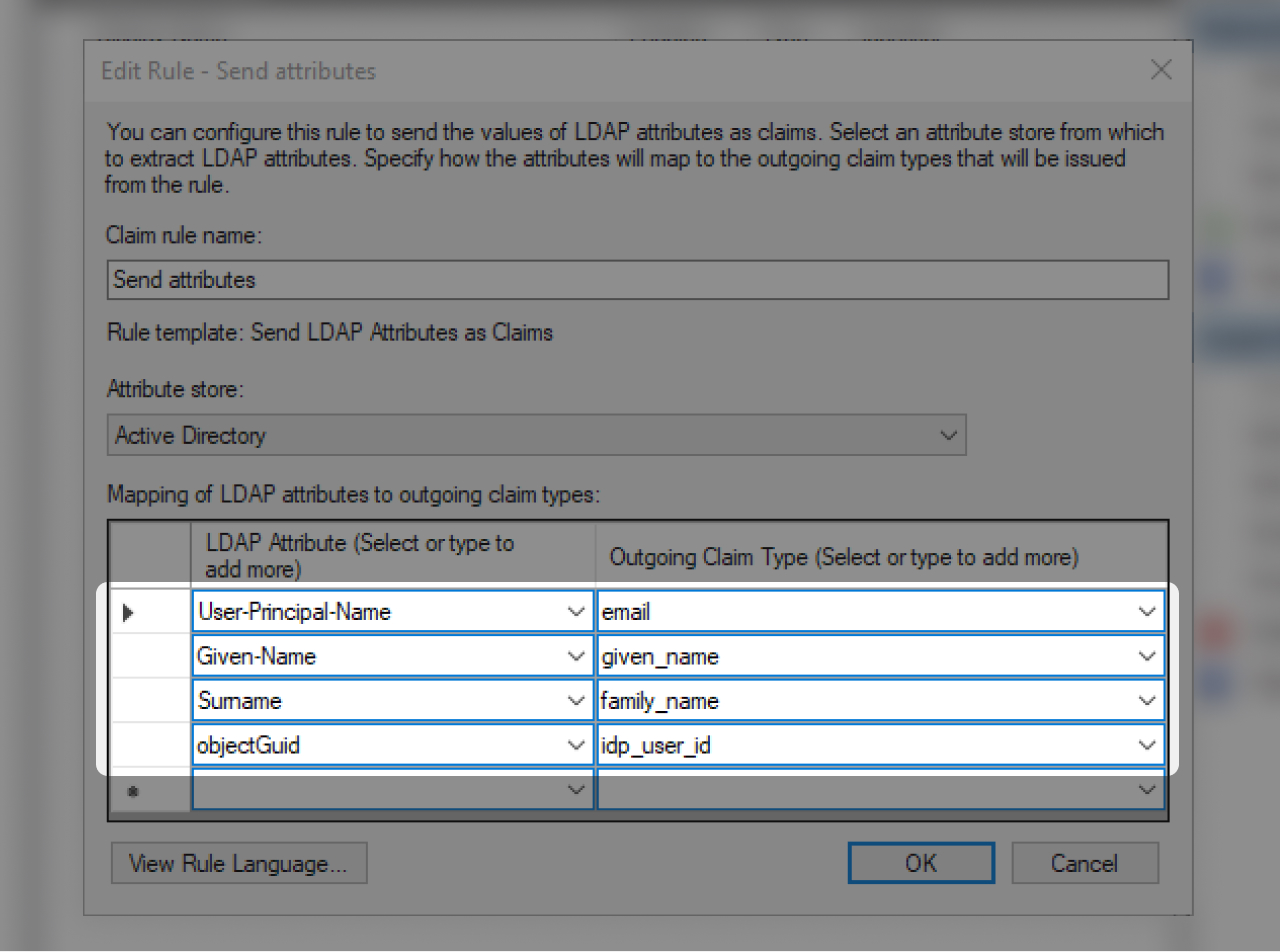
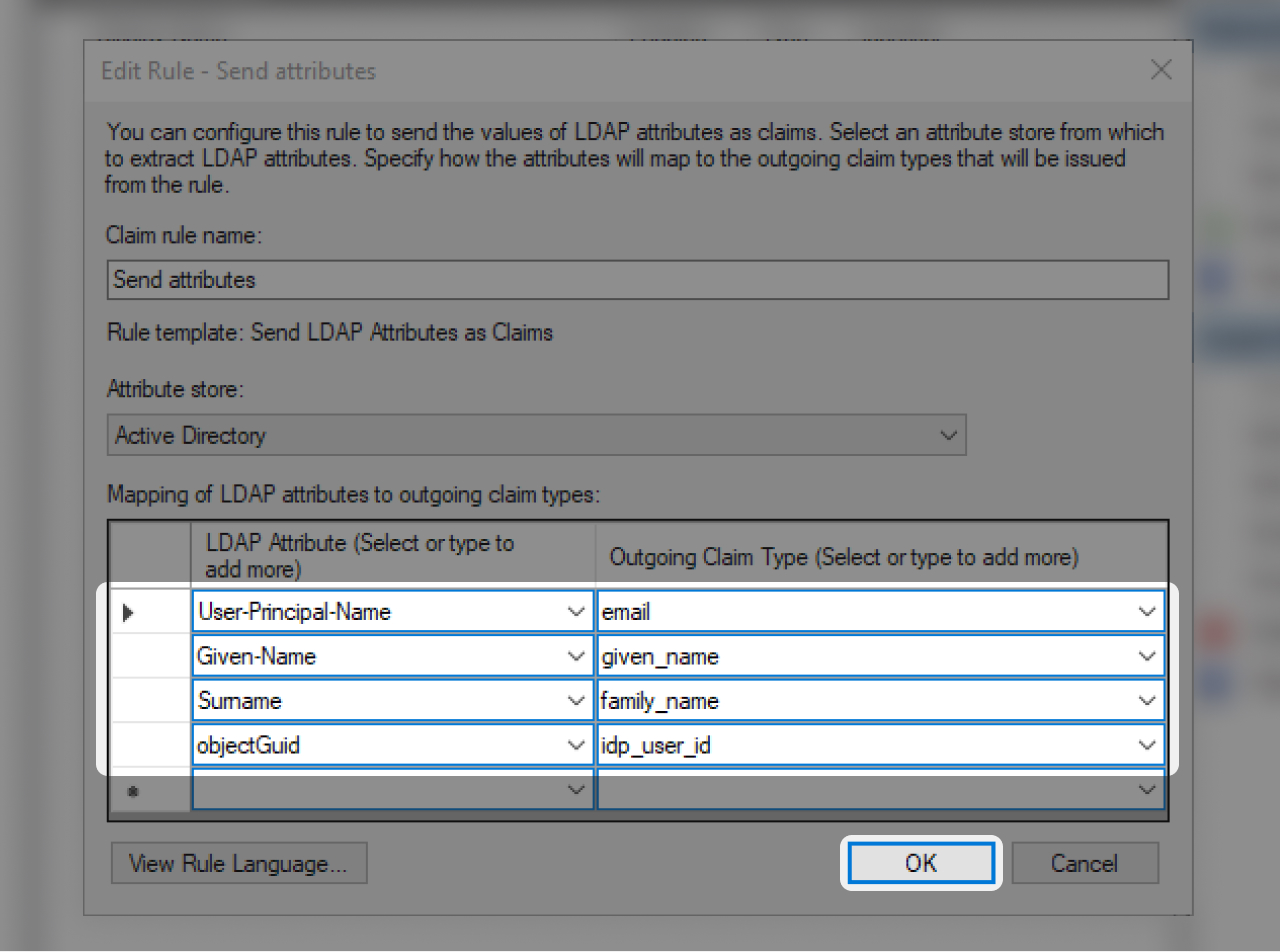
- In the "Mapping of LDAP attributes" section, please fill out the fields as shown above
- Click on "Finish"
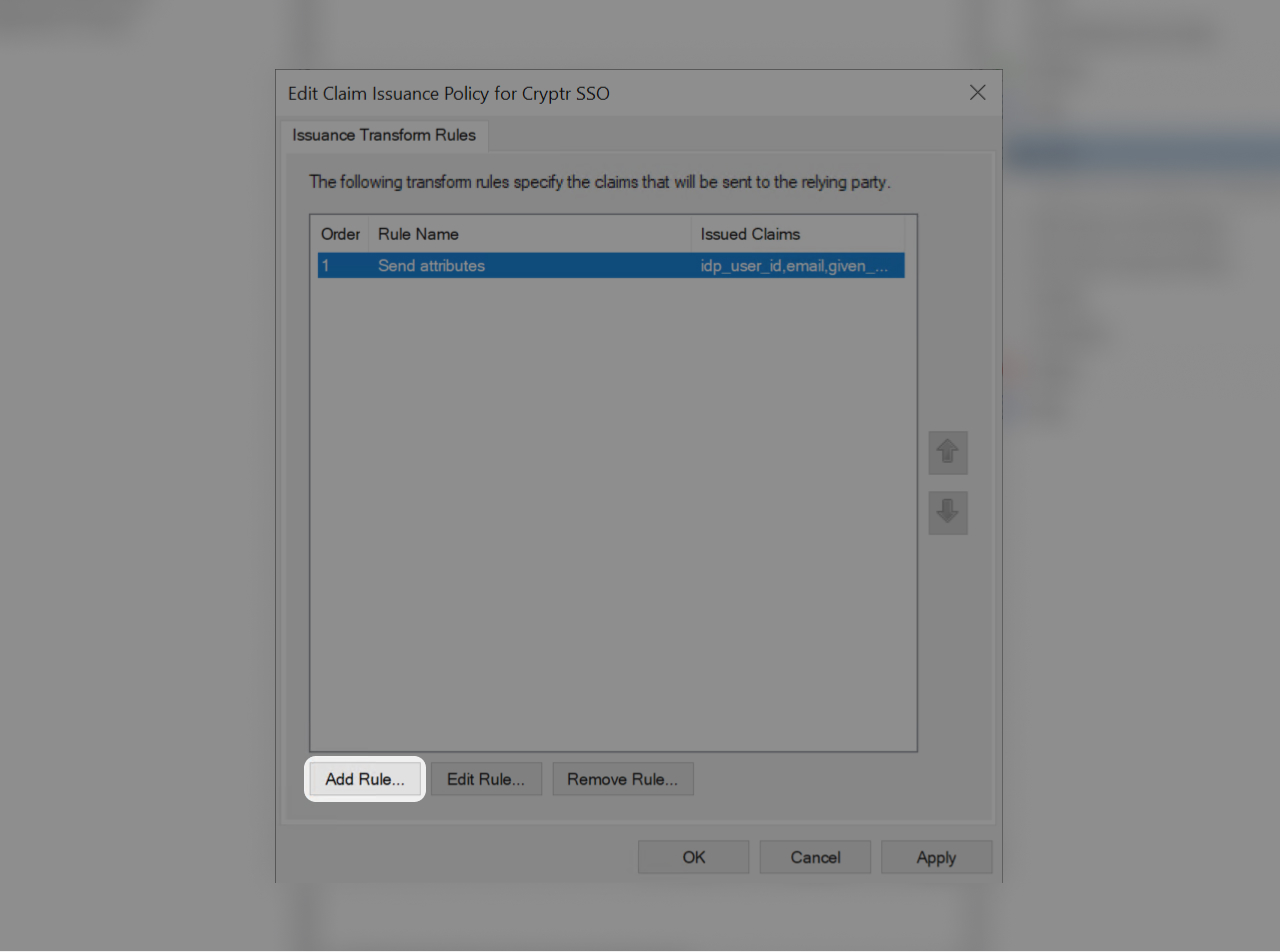
Create a new rule again by clicking on "Add Rule"
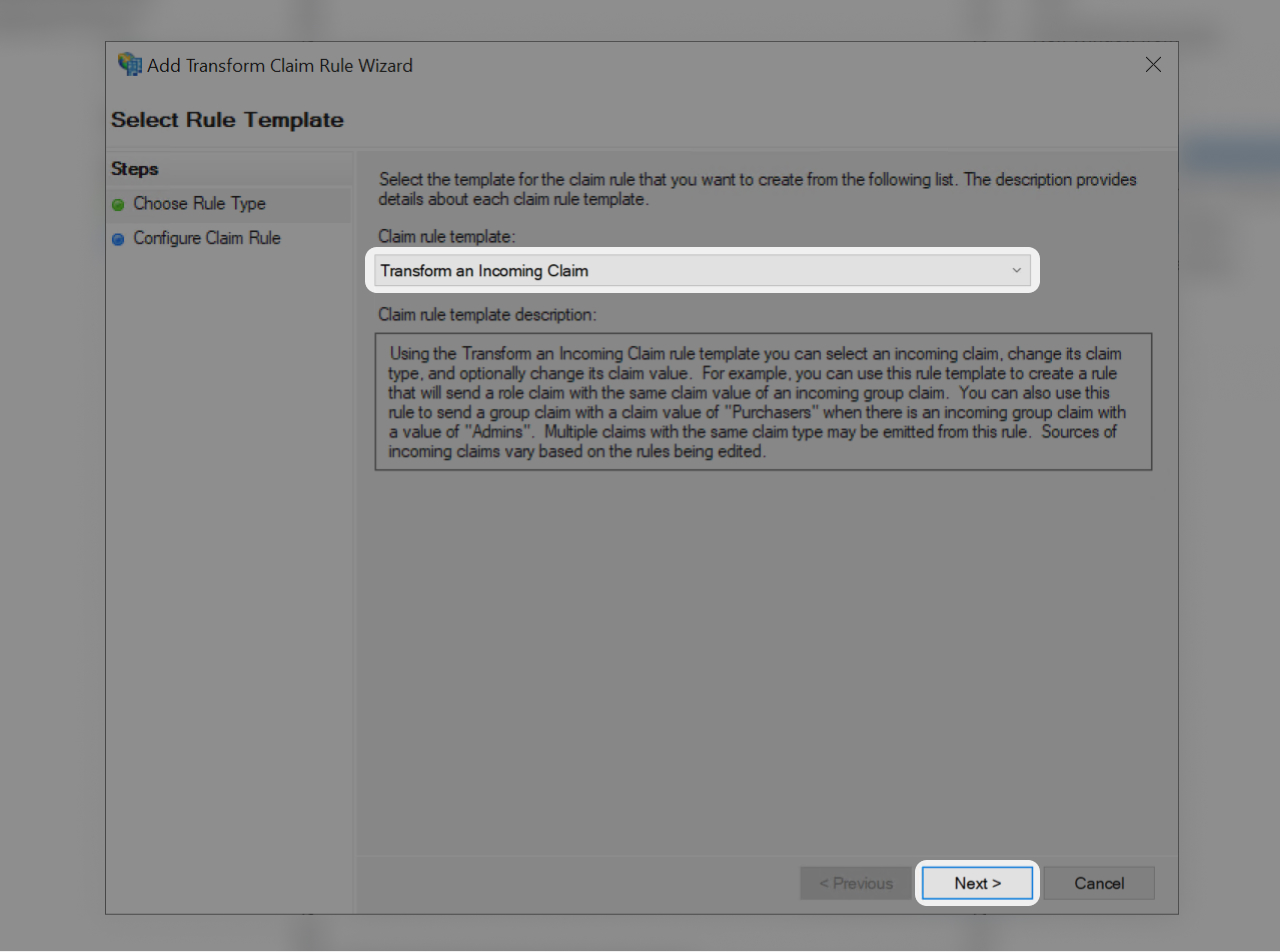
- Select "Transform an Incoming Claim"
- Then "Next"
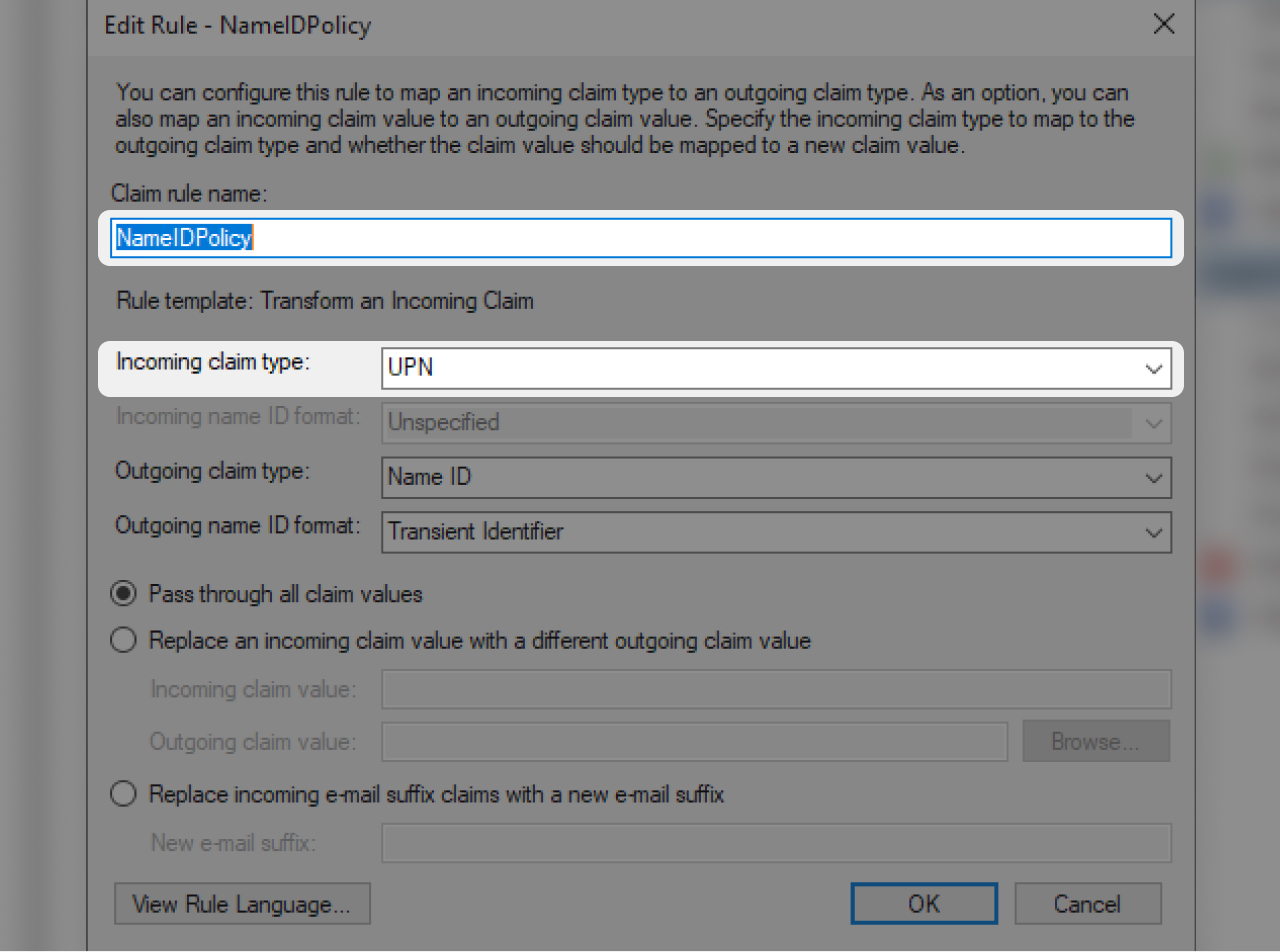
- In "Claim rule name" 👉 "NameIDPolicy"
- In "Incoming claim type" 👉 "UPN"
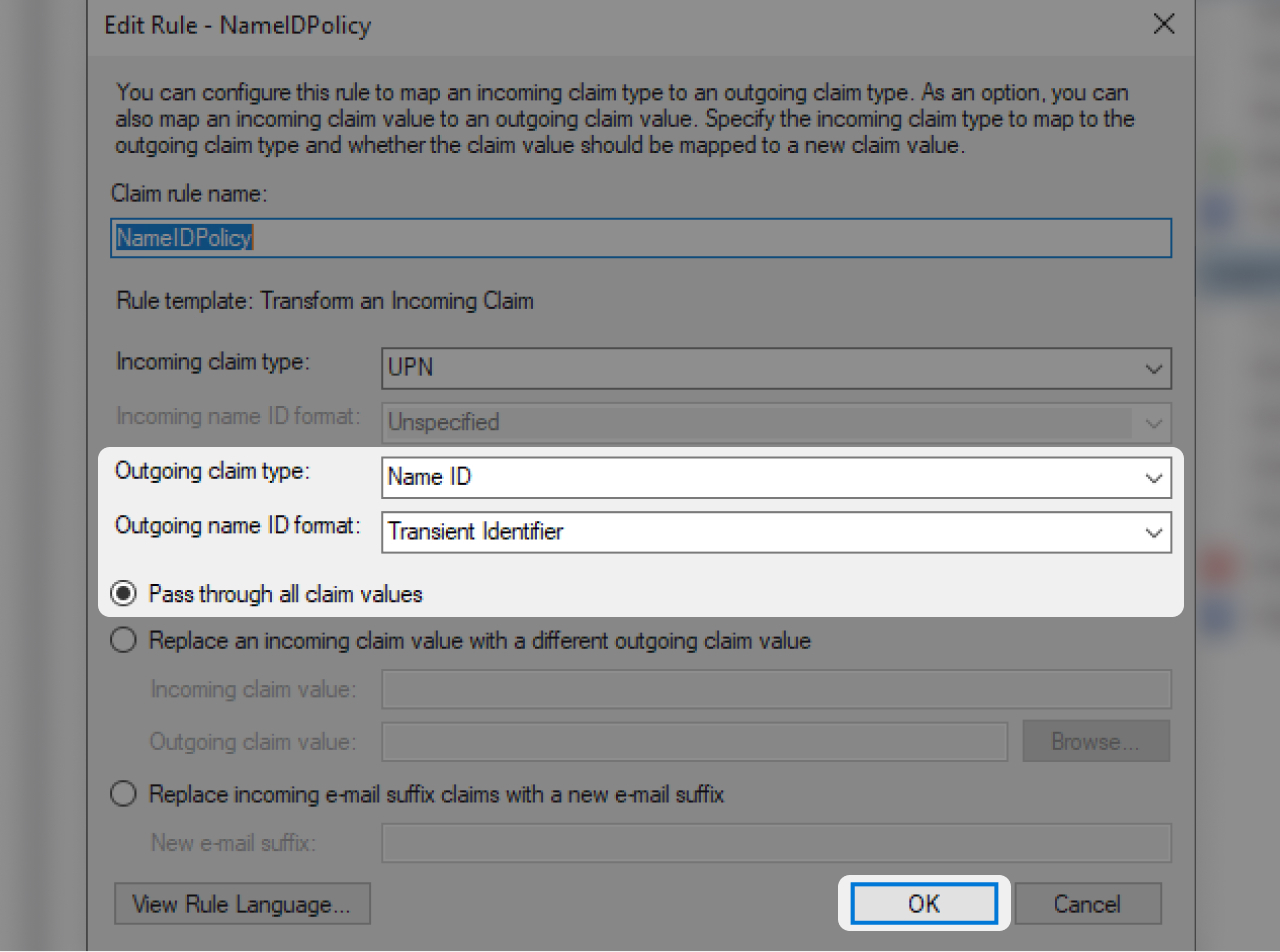
- In "Outgoing claim type" 👉 "Name ID"
- In "Outgoing name ID format" 👉 "Transient Identifier"
- Check "Pass through all claim values" and click "OK"
Relying Party Trust Properties
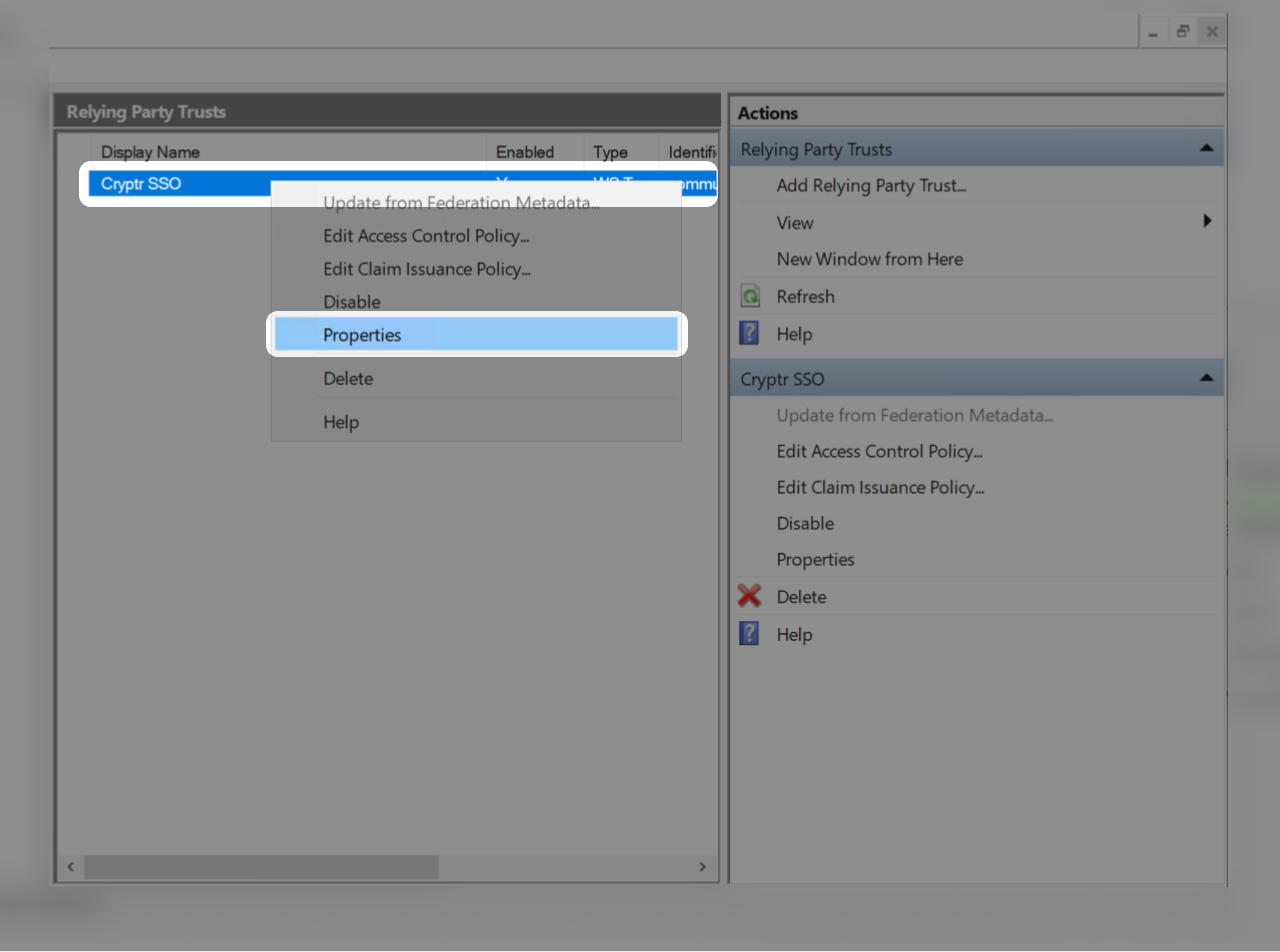
- Now click on the created Relying Party
- Then click on "Properties"
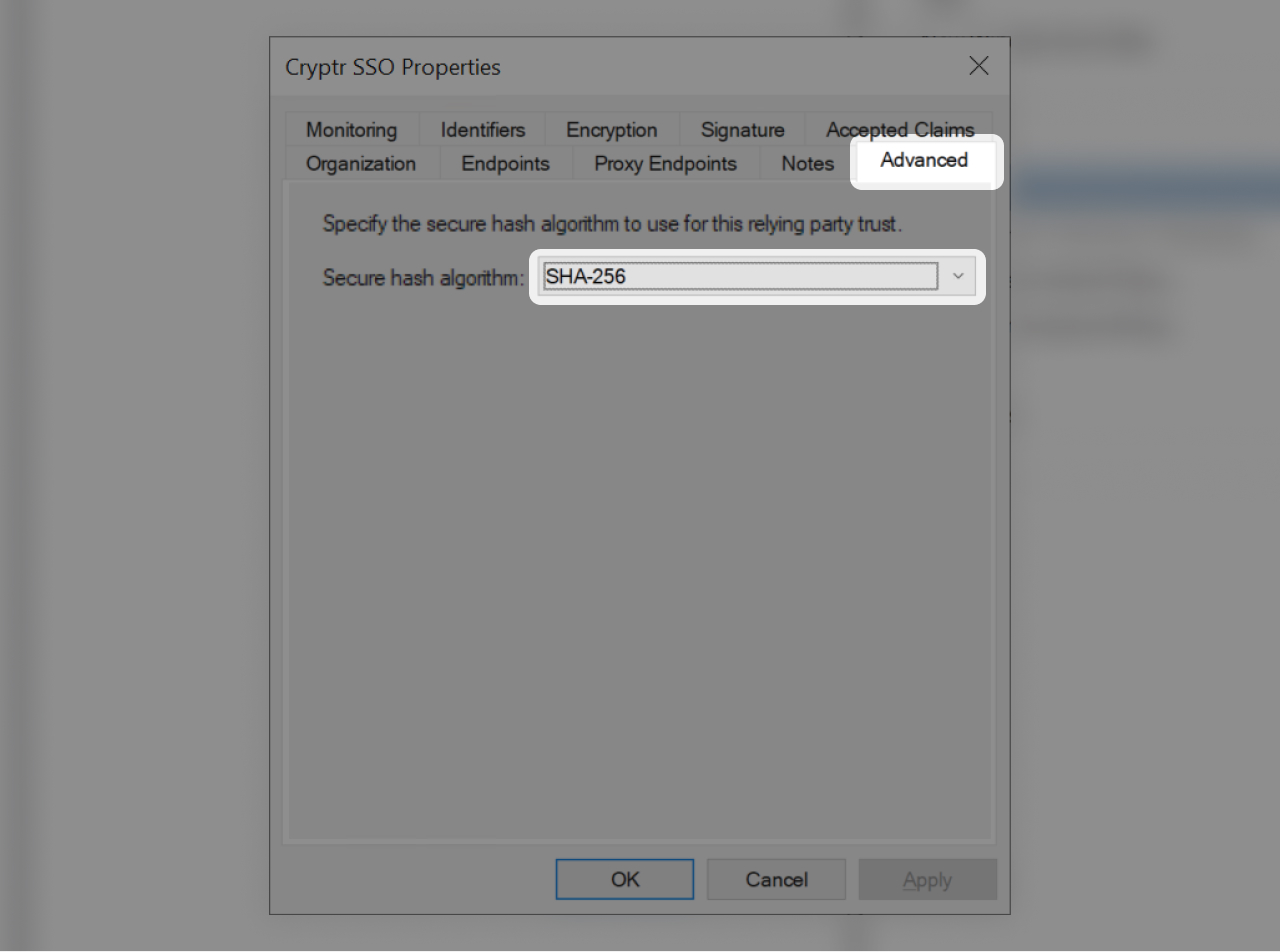
Open the "Advanced" tab and make sure the algorithm is "SHA-256"
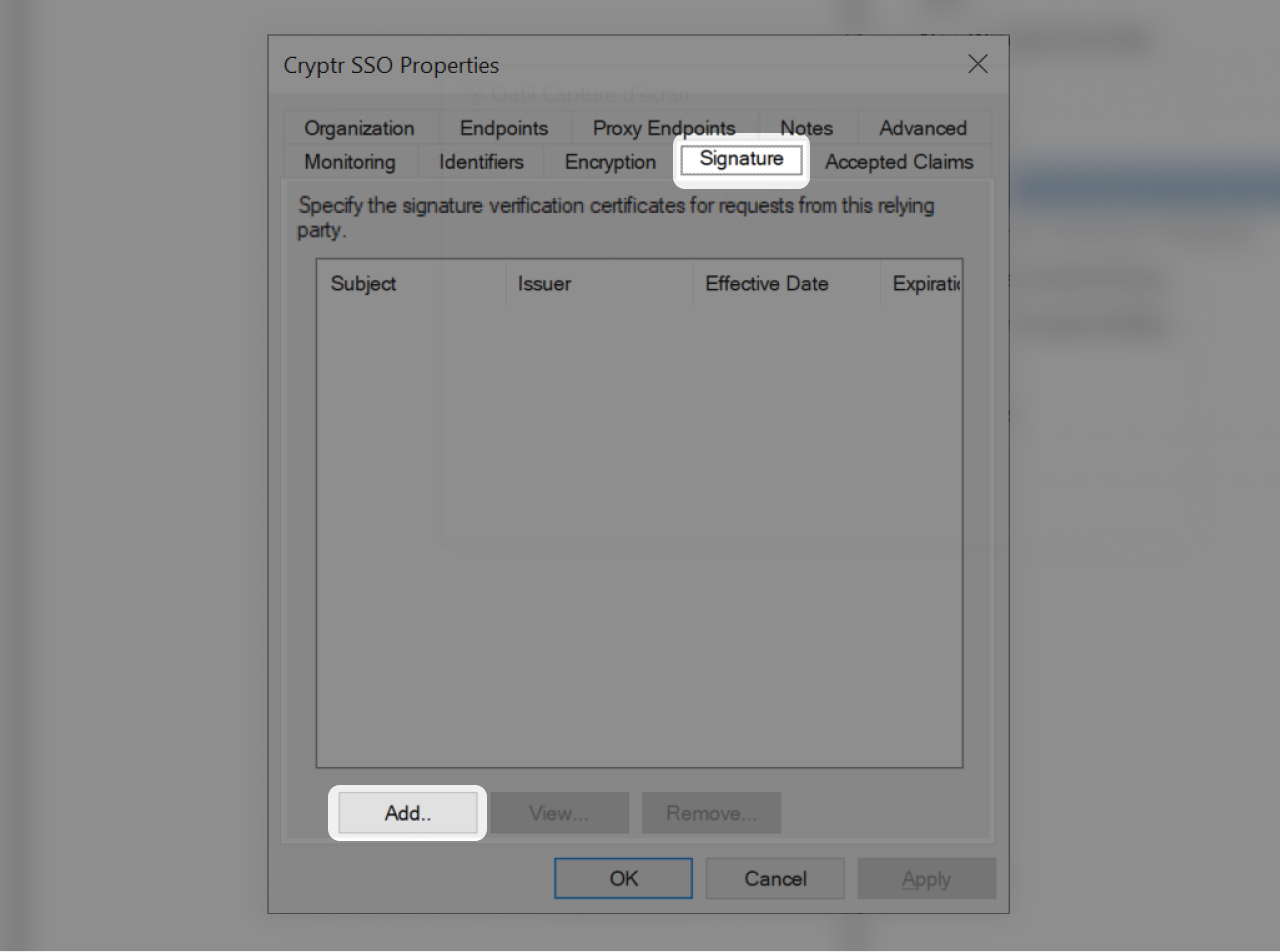
- Now go to the "Signature" Tab
- Click "Add..."
Then pick the PEM certificate that you downloaded earlier
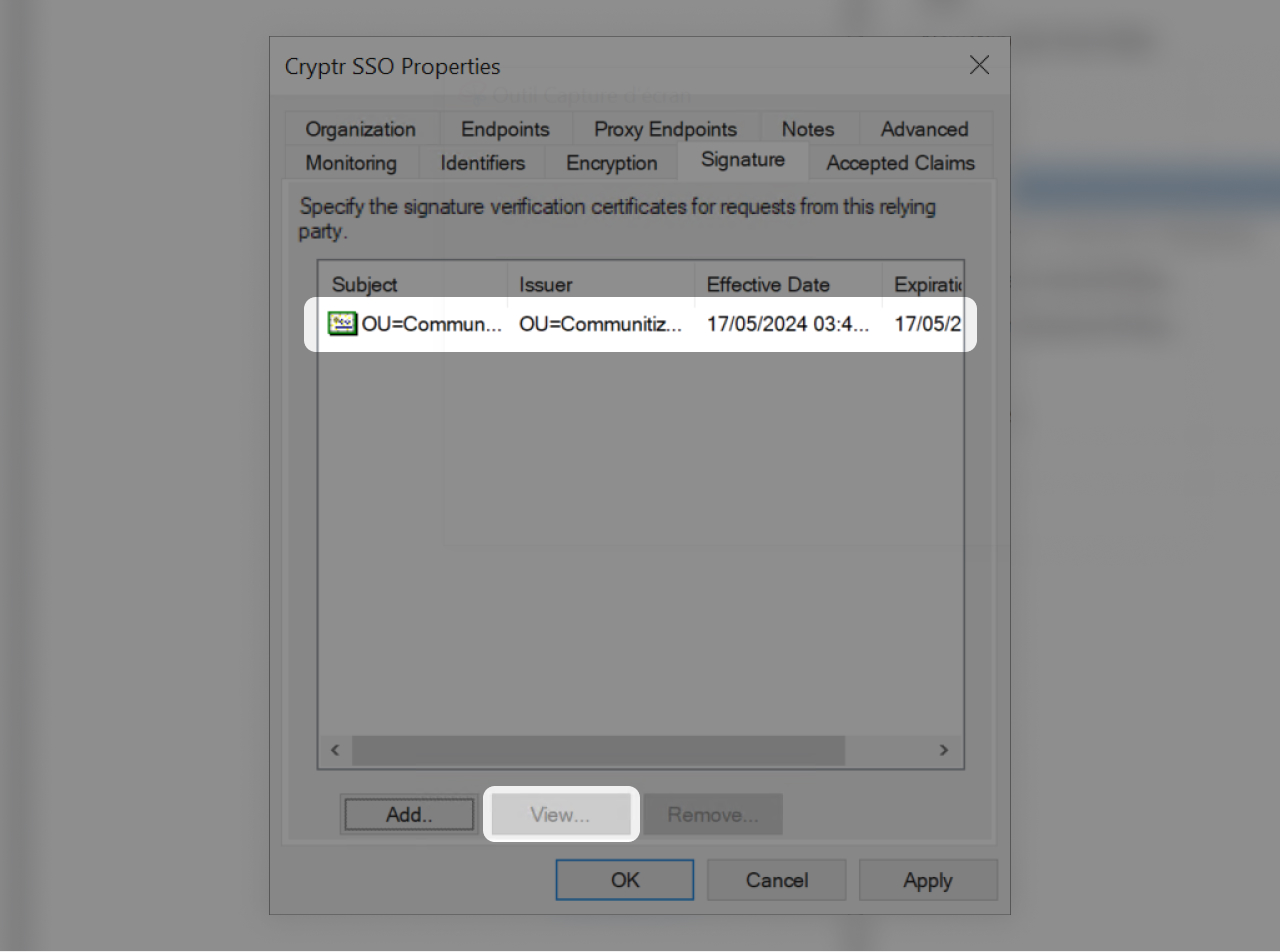
- Now that the certificate is set click on it
- Click "View..."
- If the certificate is not installed, install it.

- Now that the certificate is correctly set and installed go to the "Endpoints" Tab
- Click on "Add SAML..."
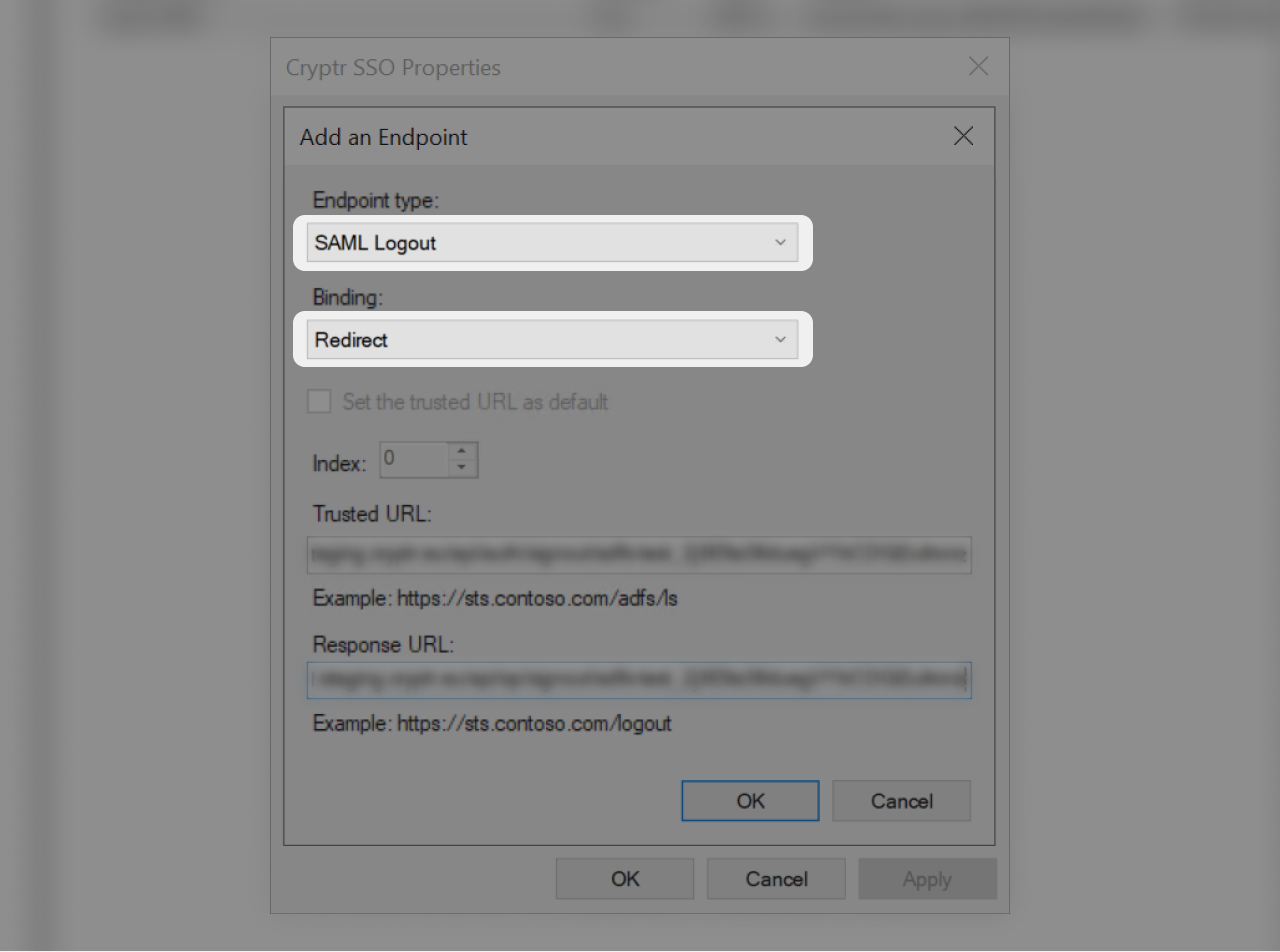
- In "Enpoint type" select "SAML Logout"
- Select "Redirect" as "Binding"
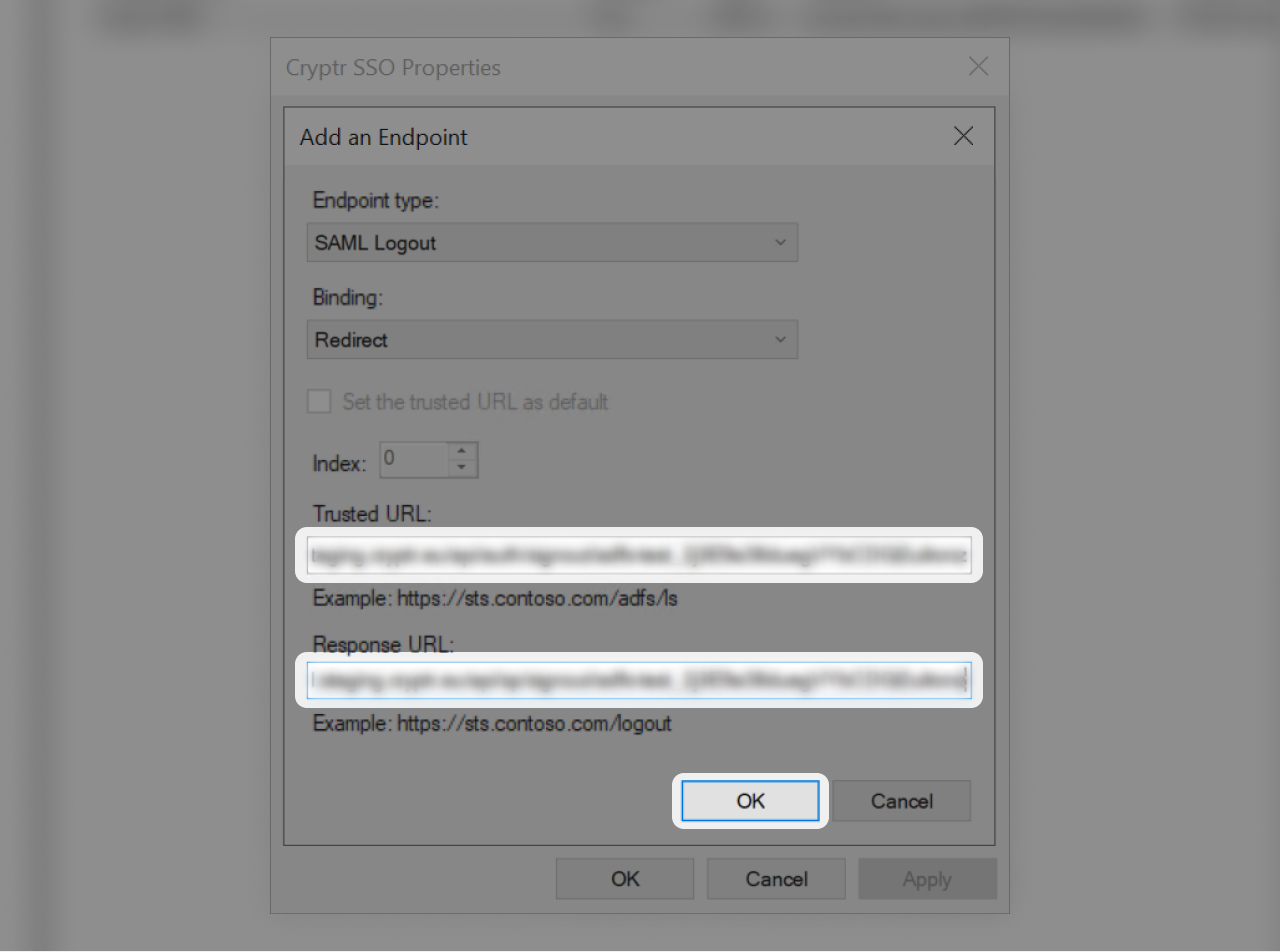
- In "Trusted URL" paste the "Trusted URL" value you find in the right side of this tutorial 👉
- In "Response URL" paste the "Response URL" value you find in the right side of this tutorial 👉
- Click "OK"
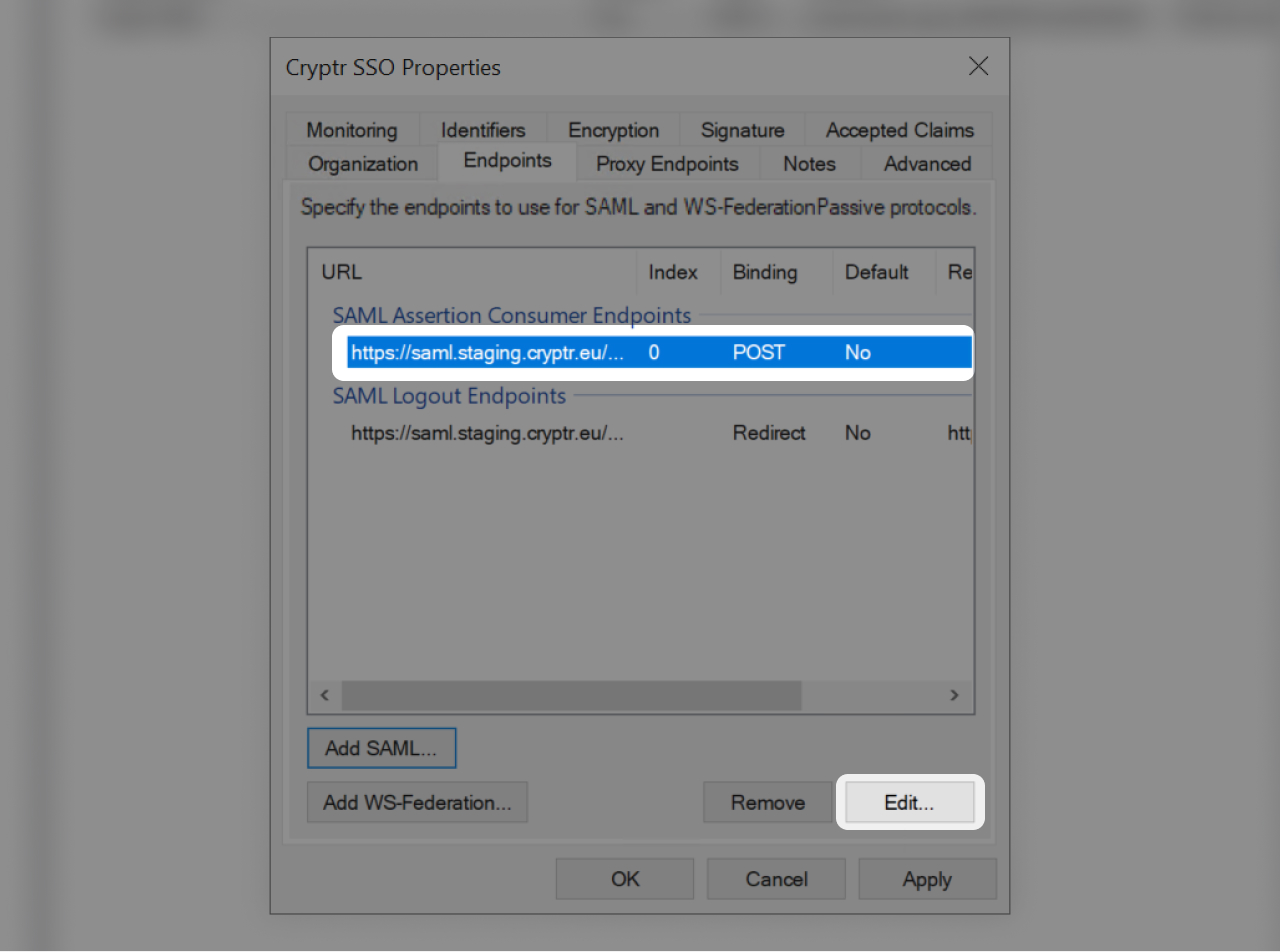
You can edit the "SAML Assertion Consumer Endpoints" to set the item as default (click and "Edit...")
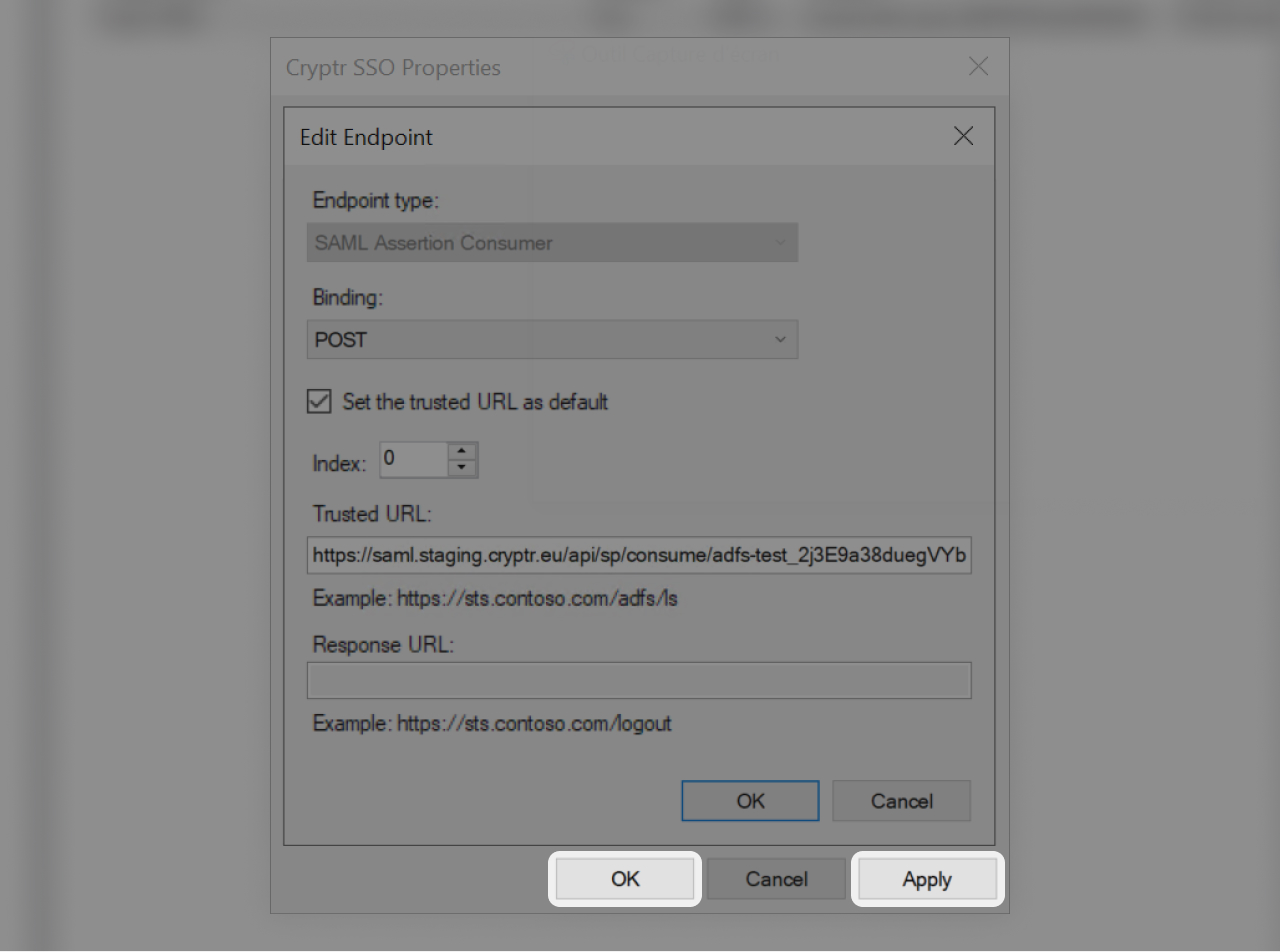
- Click "Apply"
- Then "Ok" to finish the setup
XML Metadata file

The next step will ask you for the metadata XML file of your ADFS.
In aim to do so, open https://YOUR-ADFS-SERVER/federationmetadata/2007-06/federationmetadata.xml
💡 If this doesn't return any XML, you can check where it is accessible via a Powershell terminal by entering the following command: Get-AdfsEndpoint | Select-Object fullurl
Drop your downloaded XML metadata
Test SSO login
Test SSO login